Not long after adopting the boys and moving to the Western Slope of Colorado, I realized that I had to get a life. No, seriously. I was home with the kids 24-7, after traveling for years with my job and the trauma they had experienced before they came to us made things very emotionally and physically draining. Most importantly, my guys were 4 and 2 and needed the socialization that a few hours in day care would provide.
I looked for a part time job and ended up landing one as the kitchen manager at one of the most beautiful golf courses I’ve ever played at (honestly, I initially chose it because I wanted the free golf) and I loved it.
The downside was that the food offered was criminal considering the setting; frozen beef patties or chicken breasts, fries, chips and such.
You’ve probably realized by now that I can’t abide by boring food and with an entire restaurant kitchen at my disposal, I began to play. I’d had enough and that’s how the chicken wrap was born. An instant hit!
I think I’ve replicated the recipe, but I’m not positive. In the kitchen I might look like I know what I’m doing, but I’m usually winging it; running around, stirring, tasting, chopping and adding…and adding. People ask for recipes all the time and I usually look at them like a deer in the headlights. I normally have little to no idea what I did, so that’s been the biggest challenge with this blog. I’m almost embarrassed to post this recipe with all the “optionals,” but this is how I roll.
I used 4 chicken breasts for this, but you could do 3 and cut the seasoning back a tad. I am feeding growing boys and a 6’1″ husband, so it’s a crapshoot these days.
Also, realize that I try to tame down my seasoning in these recipes, so feel free to taste and add extra. Lord knows I do and you won’t hurt my feelings. The optional ranch dressing, lettuce, cheese and tomato can really tone things down if the heat creeps up on you.
On a large griddle, or in a large skillet, melt the butter over medium-high heat and then add the onion and bell pepper. Saute, stirring until softened, about 10 minutes (less if you like a little crunch and your kids aren’t going through the “I hate onion” phase).
Add the olive oil, then chicken and cook until little pink is showing and liquid begins to collect in the pan or on the griddle, about 3-5 minutes, stirring.
Add the Old Bay, Tony’s, garlic powder, Tabasco, salt and pepper, stirring to coat all chicken pieces. Continue cooking until chicken is no longer pink in the center, about 5-8 minutes.
I like to drain most of the liquid at this point, add about 1 TBSP of butter, stir and throw extra seasoning into it, if needed, but that’s all optional.
Place cooked chicken, onions and bell peppers onto a warmed tortilla and garnish with cheese, lettuce, tomatoes and ranch dressing; roll and enjoy.
Pepper steak. Two words that often fill me with dread when I am eating out. I am not trying to be insulting, but most of my experience in restaurants or at other people’s homes have been with a bland, flour and ketchup flavored mystery stew of some kind; slivers of green pepper and onion mocking me with their ability to surrender all flavor, defying all logic.
Of course, the truth is that my mother ruined all other Pepper Steak for me with the following recipe. Other kids, when asked what they would like for their birthday dinners, usually request pizza, cheeseburgers, etc. Me? My go-to meal was always Pepper Steak…well, Mongolian Hot Pot first, then Pepper Steak (we’ll get to Mongolian Hot Pot another day and you will thank me).
I was lucky enough to travel the world with my parents throughout my childhood. As Peace Corps volunteers first, and then following my father, a biologist, chemist, wildlife specialist and world leader in his field, we scoured the globe to eliminate diseases in underdeveloped countries like the Philippines, Africa and Bangladesh (he’s still at it today in his late 60’s and is, in fact, in India as I write this). We lived in, and visited, some of the most amazing places on Earth. My mother, like me, loved to learn new cultural cuisine, and I am blessed to have had her pass some of it on to me. Especially, the following recipe!
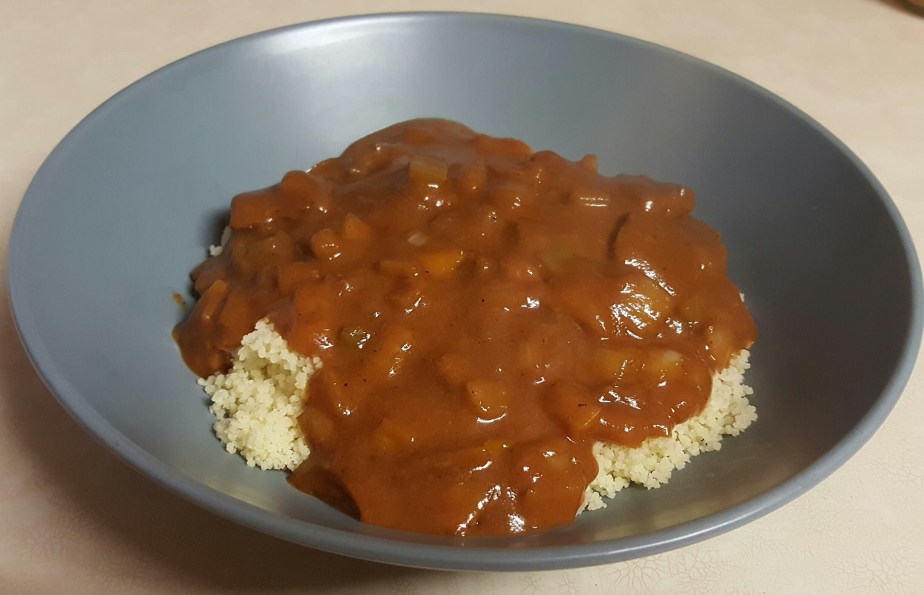
In my home, Pepper Steak is in high demand as a comfort food. We will often use a food processor for the veggies and cut the meat smaller so we can curl up with a bowl and savor it with a spoon.
Today’s recipe (only slightly tweaked, Mom) will be a party in your mouth and tummy. Enjoy!
The recipe is repeated at the bottom, sans pictures for printing and be sure to check the Notes section.
3 TBSP olive or other cooking oil (enough to coat the bottom of your pan and prevent burning)
4 cups water
2 yellow onions, sliced thinly or finely chopped
2 bell peppers, sliced thinly or finely chopped
1 cup ketchup (3)
1 cup unsalted tomato sauce (3)
2/3 cup soy sauce
1/3 cup peanut butter (4)
Package Cous cous, rice or egg noodles, prepared (5)
Directions
In a large Zip Loc bag or Tupperware container, combine the flour, 1 TBSP Tony’s, 1 tsp of the garlic powder and 2 tsp of the black pepper. Mix well and add the sliced beef, shaking to coat all the pieces.
Sliced beef works nicely
I chose to cube my beef
Dredged, my mouth is already watering!
Pretty veggies!
Spoon-ready
In a large pot, fry the dredged meat in oil over medium-high heat until nicely browned, stirring and scraping the bottom of your pot to prevent burning and sticking. Add extra oil in small drops, if needed.
Browning nicely!
Reduce heat to medium and add the 4 cups of water. Cook for 30-40 minutes until meat is tender and liquid begins to thicken, stirring often to prevent burning and sticking to the bottom of the pot, adding small amounts of water, if needed.
When meat is tender, add ketchup, tomato sauce, soy sauce, peanut butter, onions, peppers, 2 tsp Tony’s, 1 tsp garlic powder and 1 1/2 tsp black pepper.
Almost there!
Cook over medium or medium-low heat, simmering 20-30 minutes, until vegetables are tender and the flavors blend.
Serve over cous cous.
NOTES
(1) Though I’ve never made this without Tony’s, I’m told it can be done and can still be amazing, so give it a try, if you don’t have any. If you are not adding peanut butter, you are making a mistake…I mean, you don’t need to add the remaining 2 tsp of Tony’s to your gravy, but just add to taste.
(2) Sometimes I will split the garlic powder with garlic salt. It’s up to you because the soy sauce can kick the saltiness up. Just remember that you are serving over cous cous or rice, so the flavor will be slightly diluted, so to speak.
(3) I have chosen to alter the original recipe because it calls for all ketchup and this was a little salty. Again, you’re serving over cous cous, so it shouldn’t make a big difference if you choose not to use tomato sauce.
(4) Adding peanut butter gives the dish a uniquely amazing flavor you will not regret. A bit of an African flair, if you will. Leaving it out converts the dish to regular pepper steak, which is still good, but not the party on your taste buds that peanut butter starts. Remember this is a dish which needs to cook for a while for the flavors to marry in perfection.
(5) Though you can serve this over rice or egg noodles, cous cous is the absolute best, especially when going the peanut butter route. If you aren’t familiar with cous cous, it is yummy, light, tiny pasta available at most grocery stores, sold in a small box, or a large plastic container. It is incredibly easy to prepare; just add it to boiled water, remove from heat, cover 5 minutes and fluff with a fork.
3 TBSP olive or other cooking oil (enough to coat the bottom of your pan and prevent burning)
4 cups water
2 yellow onions, sliced thinly or finely chopped
2 bell peppers, sliced thinly or finely chopped
1 cup ketchup (3)
1 cup unsalted tomato sauce (3)
2/3 cup soy sauce
1/3 cup peanut butter (4)
Package Cous cous, rice or egg noodles, prepared (5)
Directions
In a large Zip Loc bag or Tupperware container, combine the flour, 1 TBSP Tony’s, 1 tsp of the garlic powder and 2 tsp of the black pepper. Mix well and add the sliced beef, shaking to coat all the pieces.
In a large pot, brown the dredged meat in oil over medium-high heat until nicely browned, stirring and scraping the bottom of your pot to prevent burning and sticking. Add extra oil in small drops, if needed.
Reduce heat to medium and add the 4 cups of water. Cook for 30-40 minutes until meat is tender and liquid begins to thicken, stirring often to prevent burning and sticking to the bottom of the pot, adding small amounts of water, if needed.
When meat is tender, add ketchup, tomato sauce, soy sauce, peanut butter, onions, peppers, 2 tsp Tony’s, 1 tsp garlic powder and 1 1/2 tsp black pepper. Cook over medium or medium-low heat, simmering simmering 20-30 minutes, until vegetables are tender and the flavors blend.
Serve over cous cous.
NOTES
(1) Though I’ve never made this without Tony’s, I’m told it can be done and can still be amazing, so give it a try, if you don’t have any. If you are not adding peanut butter, you are making a mistake, I mean, you don’t need to add the remaining 2 tsp of Tony’s to your gravy, but just add to taste.
(2) Sometimes I will split the garlic powder with garlic salt. It’s up to you because the soy sauce can kick the saltiness up. Just remember that you are serving over cous cous or rice, so the flavor will be slightly diluted, so to speak.
(3) I have chosen to alter the original recipe because it calls for all ketchup and this was a little salty. Again, you’re serving over cous cous, so it shouldn’t make a big difference if you choose not to use tomato sauce.
(4) Adding peanut butter gives the dish a uniquely amazing flavor you will not regret. A bit of an African flair, if you will. Leaving it out converts the dish to regular pepper steak, which is still good, but not the party on your taste buds that it starts. Remember this is a dish which needs to cook for a while for the flavors to marry in perfection.
(5) Though you can serve this over rice or egg noodles, cous cous is the absolute best when going the peanut butter route. If you aren’t familiar with cous cous, it is yummy, light, tiny pasta available at most grocery stores, sold in a small box, or a large plastic container. It is incredibly easy to prepare; just add it to boiled water, remove from heat, cover 5 minutes and fluff with a fork.
If you know me well enough, you know that I loathe fried chicken. I know that’s sacrilege coming from a Southern girl, but I can’t help it: the greasy chunks of breading, the fear of finding pink at the center of a big bite of drumstick or the chance it is over cooked and I could lose a tooth, all make my stomach turn.
Sadly (or so I once felt), the males in my house adore fried chicken, especially the kids, so I decided to play one day. The end result is the recipe below and it changed my status from fried chicken hater, to big fan. Seriously, it’s a wee bit healthier than straight-fried (in that the bulk of the oil is drained on towels and in the oven. Ok, just go with me on this) and it is cause for great celebration in this house when I announce that’s on the menu. The crust is perfect, but the sauce is the kicker. I received a very strange look from J last night when I cleaned my plate and told him I could bathe in this sauce.
Enjoy!
Fried Chicken with Thai Sauce
Look at me. I’m beautiful.
Ingredients
1 1/2 cups flour
1 can coconut milk
1/3 tsp salt
1/2 – 1 tsp garlic powder
1/2 – 1 tsp ginger
1/4 – 1/2 tsp cayenne pepper
4 lbs chicken breast, cut into 2 inch strips, or drumsticks, or a mixture
Peanut oil for frying. Other oils work as well.
Place half of the flour (I will often throw a little Tony’s into this first bowl) into a bowl and the coconut milk into another separate bowl. In a third bowl, mix the salt, garlic, ginger, cayenne and the remaining flour, combining well.* Dip the chicken in the plain flour first, then the milk and last the seasoned flour mixture, coating well.
In a large stovetop or electric skillet, fry the chicken in batches until browned with a nice golden crust; move to paper towel to drain. I learned to only do 5 or 6 pieces at a time to better maintain a frying temperature between 350 and 375 degrees.
Transfer to a greased baking dish, or, to maintain the best crust and for easier clean up, cut wax paper to fit the bottom of a cookie sheet and spray lightly with cooking spray.
Bake at 400 degrees for 25-35 minutes depending on the thickness of meat.
Sauce
Ingredients
1 cup water
1/3 cup packed brown sugar
1/4 cup soy sauce
1 TBSP + 1/2 tsp corn starch
2 tsp rice vinegar
2 tsp peanut butter
1/4 tsp cayenne
1/4 – 1/2 tsp ginger
3 TBSP finely chopped, fresh cilantro (dried does fine in a pinch)
Combine all but cilantro into a small sauce pan. Bring to a boil and stir for 2 minutes until sauce thickens. Remove from heat, stir in cilantro and pour over chicken.
* I will often double the recipe for the seasoned flour, reserving half for when the coconut milk renders the mix too chunky. The finer flour adheres much better for a nicer crust that stays on the chicken through the entire cooking process.
Another look at the breast chunks, since the drumsticks disappeared before I could photograph them.
When we decided I would stay home with the kids, I soon realized that simple domestic chores were not enough to keep my busy brain occupied. Not that those chores didn’t demand my full-time attention, but ADHD is a relentless companion. Without constantly learning and doing, depression can creep in, especially when you are a post-menopausal adult woman (yes, it happened early)…SQUIRREL!!!
Um, okay, so thanks to the magic of the internet I’ve been able to learn a lot. Plus, when your husband is gone for two weeks at a time and you’re watching your pennies, it pays to learn to install a new toilet, faucet, sink, etc. yourself. When I ran out of renovations at the old house, I turned my full attention to trying new things in the kitchen. The day my youngest asked for the “gravy hamburgers” they served at school, I set my sights on learning to make Salisbury Steak.
I’ll be honest, I’m nursing some nausea due to the antibiotics I’m on for a sinus infection, so the thought of Salisbury Steak makes my stomach turn, but only for a second. It’s one of those foods that takes me back to the school cafeterias of my youth, staring at a nasty looking, gelatinous gravy, smothering a flattened, unidentifiable meat puck. Inside my heart would leap, pretending to hate on the outside, but rejoicing on the inside. I admit it was a guilty pleasure and I went decades without, but I will no longer deny that I love it. I hope your family does too, so without further ado…
First, let’s talk seasoning. You will see “Tony’s” in many of my recipes. Tony Chachere’s (pronounced ‘”sash-er-ees in the Cajun way to thwart true French pronunciation on certain words) is a Creole seasoning available in grocery stores throughout the country now, or online. It’s a blend of many different herbs, salt and pepper, but is also available in a salt-free version. We use it on everything because it is amazing; no real heat to it, but it starts a party in your mouth immediately. You will never be able to eat pizza without it again. You’ve been warned.
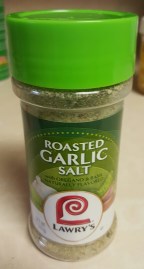
Little, green can of magic.
I’ve also grown rather fond of roasted garlic salt when I don’t have time to roast my own garlic, or I’m simply feeling lazy and this one is quite good.
Salisbury Steak with Creamy Mushroom Gravy*
Ingredients:
2 pounds ground beef
1/3 cup plus 1 TBSP crumbled Ritz, or similar crackers
1 tsp salt, or less, if you’re not a fan
1 tsp black pepper
2 eggs, beaten
4 TBSP minced onion
1 tsp poultry seasoning, divided in half
6 TBSP butter
8-16 ounces of canned mushrooms, with the liquid (depending on your feelings for mushrooms, you can replace with 1/4 cup milk or water, if need be.)
6 TBSP all-purpose flour
6 Beef Bullion cubes (yes, that’s a lot. Sodium intake for today is taken care of, but I suppose you could hold back a few)
6 cups of milk
1 tsp Tony’s (If you don’t have any, do not fret. The flavor will not suffer)
Garlic salt to taste
Directions:
In a large bowl, combine the ground beef, eggs, cracker crumbs, onion, salt, pepper and 1/2 tsp of the poultry seasoning. It wouldn’t be a terrible idea to throw in a dash of the Tony’s and roasted garlic salt, if available, at this point. Mix with your hands until ingredients are combined without overworking the meat. Shape the patties, usually 6-8, keeping them around half an inch, but no more than 1 inch thick.
Place the patties in a large skillet and cook them over medium-high heat, being careful not to burn them, usually 4-6 minutes per side, turning until they are browned and cooked through to your taste. Do not press the patties flat while cooking, as this robs them of their flavor and can make ground beef taste dry. Drain the grease and place the patties on a plate, making sure to keep them warm.
Don’t judge my patty sizes. I hate working with ground beef.
The absolute best tongs for this job!
In the same skillet, melt your butter and then add the mushrooms with liquid. Stir and cook for about 3 minutes and then sprinkle the flour in, mixing until no lumps appear. Add the bullion cubes, remaining 1/2 tsp of poultry seasoning, Tony’s, a dash of the garlic salt and slowly, the milk (you can add a bit less if you like a thicker gravy). Cook and stir over medium heat until the gravy is smooth and starts to thicken. Add salt and pepper to taste and then return the patties to the gravy, cooking on low heat, uncovered for 10 minutes, stirring occasionally.
My stirring assistant did a fantastic job.
Let’s face it, there is just no way to make this stuff look appetizing. Luckily, the taste will quickly distract you from its appearance.
Serve over egg noodles, rice or mashed potatoes.
*You can cut the gravy in half if you want the meat to stand alone, but living in Louisiana makes us gravy folk. I do however recommend the egg noodles since they are lighter. We like our gravy rather thick and it hugs the noodles quite nicely!
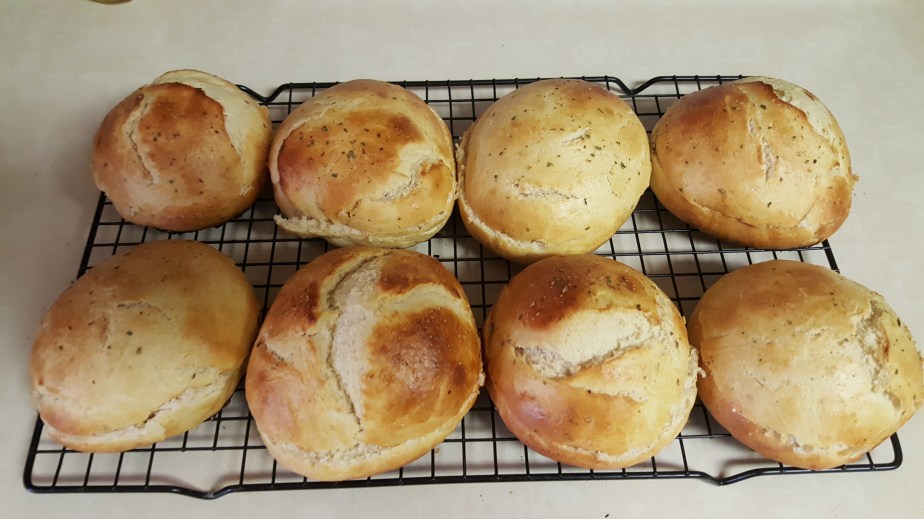
It was sloppy joe night at our house and I realized that I didn’t have any hamburger buns. Calling on the power of Google, I found the following recipe and they were delicious! You can easily change the size and number of buns you make and I chose to do 8 larger buns for my crew. They were almost too big, but still awesome. I didn’t have sesame seeds, so I did the egg wash and used roasted garlic salt. Thanks, Girl vs. Dough!
These are the 8 that I made. Don’t judge my ability to eyeball equal portions.
Heat oven to 425 degrees F. Spray 2 baking sheets with cooking spray.
In a large bowl, whisk yeast into warm water until dissolved. Add sugar and oil; let stand 5 minutes. Add egg, flour and salt. Use a wooden spoon to stir until just combined.
Turn dough out onto a lightly floured surface. Knead by hand 3 to 5 minutes, adding more flour to dough as needed until a smooth, soft, elastic and only slightly sticky dough forms.
Divide dough into 12 equal pieces*; shape each piece into a smooth ball. Place buns at least 3 inches apart on prepared baking sheets (6 buns per sheet). Cover buns with tea towels or lightly greased plastic wrap; let rest 10 minutes.
Uncover buns and brush tops with egg wash; sprinkle with sesame seeds. Bake 10 to 15 minutes, rotating pans halfway through baking, until buns are golden brown. Transfer to a cooling rack to cool completely.
*NOTE: This recipe makes 12 small slider-size buns. For larger buns, simply divide dough into fewer pieces and increase the baking time.
If you are like me, you enjoy a good sandwich now and then, but finding the perfect bread can be challenging. Okay, that’s a bit melodramatic and, truth be told, right now it’s all about saving money for those of us living in regions dependent on oil and gas.
Anyway, homemade bread is hard to beat and a bread machine makes things so easy! My only issue with bread machine bread (almost started shortening that to BM, but I caught it just in time), is that it can be so huge. I made a loaf last week and it was delicious, but you could have surfed the Gold Coast on a slice of that baby.
I found this gem of a recipe and love that you can have the bread machine (snicker) do the hard part for you. I set mine to “Dough,” then when it was ready, I threw it into a longer loaf pan and finished it in the oven. Fantastic!
Without further ado…
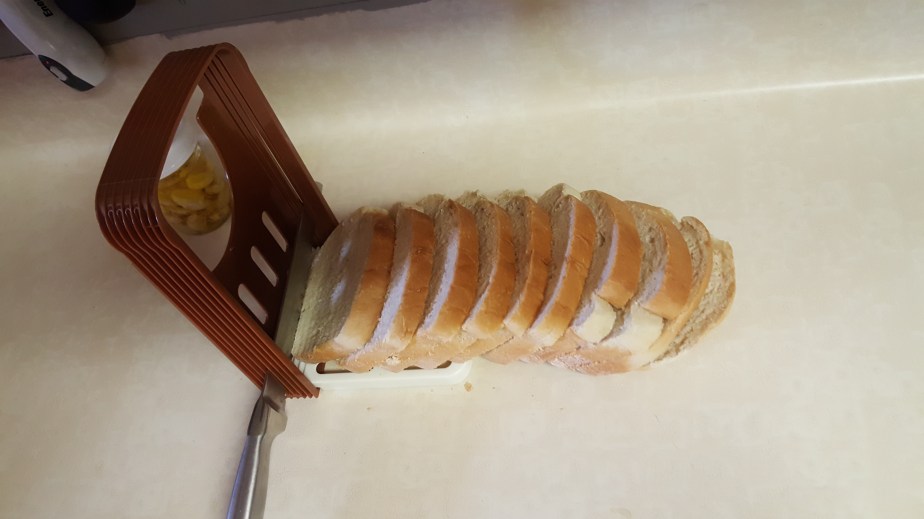
Here’s my picture, with this awesome bread slicer I got on Amazon.com for around $11.
Sadly, you will be unable to use this bread as a life raft, as you could with its predecessors.
Extremely Soft White Bread (Bread Machine)
By TKDLVR on July 10, 2009
Photo by Julie P.
Prep Time: 0 mins
Total Time: 25 mins
Yield: 1 Loaf
About This Recipe
“This is the softest white bread I have ever baked. It was sent to me via email and I cannot remember who sent it. This is the only recipe I use for white bread.”
Ingredients
1 cup hot water
2 teaspoons yeast
3 tablespoons sugar
1/4 cup vegetable oil
1 teaspoon salt
3 cups white flour
Directions
Put your hot water, yeast and sugar in your bread machine. Let stand 6-12 minutes depending on the temp of your water. Your yeast will foam.
For the last two weeks I have been having my rear end kicked by the mother of all sinus infections, but yesterday I decided I’d had enough. After the drunk driver took out our front fence on Saturday night, I had a tough time sleeping and woke up with zero energy on Sunday, feeling that sinus pressure trying to kill me. I resigned myself to working through the pain and being productive. This was not the smartest idea, but it felt really good in the end to accomplish something besides blowing my nose and waiting for death.
Three things found their way onto Sunday’s agenda; baking sandwich bread, making salsa and making buns for sloppy joes. All three recipes are fantastic and beg to be shared.
There is something amazing about creating food from scratch with your own hand and watching people enjoy it. If you had told me ten years ago that I would be into this sort of thing, I likely would have laughed in your face. I was a career woman on the rise and not terribly interested in being domestic. Yet, here I am and I’m happy with the way things are turning out.
Let’s start with the salsa. This is a recipe passed to me by my brother-in-law and it will ruin you for all other salsa. I’m sorry, but I have to be honest. The recipe is all over the internet, so neither of us can claim it, but whoever you are, Annie, you are a genius!
8 cups tomatoes, peeled, chopped and drained (see peeling idea below)
2-1/2 cups onion, chopped
1-1/2 cups green pepper, chopped
3 – 5 jalapenos, chopped
6 cloves garlic
2 teaspoons cumin
2 teaspoons ground black pepper
1/8 cup canning salt
1/4 cup fresh cilantro, chopped
1/3 cup sugar
1 cup 5% apple cider vinegar (I like to do 1/2 cup apple cider vinegar and 1/2 cup lime juice for taste. Personal preference rules, as long as it adds up to one cup)
2 cups (16 oz.) tomato sauce
2 cups (16 oz.) tomato paste
Mix all ingredients, bring to a boil and boil for 10 minutes. Pour into hot pint jars leaving 1/2″ headspace, seal and process in a boiling water canning bath for 15 minutes.
Makes about 6-7 pints.
Additional altitude and other fantastic information can be found at:
So, if you’re like me, prep is 90% of the battle when it comes to creating your culinary masterpieces. I’m not a fan of messes or back pain, so fewer dishes, nicks, burns and bruises, with less time on my feet, are ideal.
Many people like to blanch their tomatoes and I do this sometimes myself, but for this salsa in particular, I really like to have that hint of roasted flavor and it’s so easy to do.
Place your oven’s top rack about 6 inches from the heating element and turn on the broiler.
Slice your tomatoes in half, taking the core first, if you wish (this makes things a little less messing in the end) and place them face down on a cookie sheet. You can cram them on, as long as you only place them in a single layer.
Place the cookie sheet in the oven for 12 to 15 minutes. The skin will start to crack and even darken a bit, but once you smell roasting tomato, remove the pans and cool.
Simply pinch the skin and it will come right off. There will be a lot of liquid, as with most jobs involving tomatoes, so a colander over the sink and a towel or two are a good idea.


 It’s even pretty before you cook it!
