Chicken with Asparagus and Roasted Pine Nuts

Mothers all over the world are faced with the daily battle of how to get their children to eat certain foods without having to pull out the biggest weapon in our arsenal, “Because I said so!”  Now, I don’t want to spark a debate about whether or not we should make our kids eat things they don’t want to eat, but I will say that I make my kids try everything at least once.  Not only do I want to expose them to as much culinary variety as I can, I want them to be able to go anywhere and understand menus or to be able to go to a friend’s house and not have to demand a separate dinner for themselves.  I have made it abundantly clear that I do not run a diner and you eat what’s in front of you, whether here, or at another house.  Your likes and dislikes will be noted and taken into consideration in the future (maybe.  Meh, probably).

That being said, asparagus was a tough one for me.  Until my friend Sean introduced me to its wonders at a fondue party back in the 90’s (yeah, we still do those), I had no idea what I was missing.  Also, if we’re honest, there is always that moment of panic when you head to the restroom after eating asparagus, when you think you may be dying, only to realize it’s asparagus magic.  I assumed my kids would feel the same trepidation, but the following recipe laid those fears to rest.  On the night I make this meal, the pre-dinner conversation usually goes something like this:

“Mom, what’s for dinner?”

“The chicken with pine nuts, asparagus and penne pasta.”

“Woo-hoo!  Awesome!  Thank you, Mommy!” I’m only Mommy when something really cool goes down these days and last night I even got two hugs for this announcement.

Actually, the best testimony for this meal involves cooking it for our former pastor.  We had invited he and his wife for dinner and they drilled me on what was on the menu.  Apparently, they are picky eaters who don’t let others cook for them and usually bring their own food everywhere they go (just one of their many oddities, and no, it wasn’t dietary issues).  If you know me, you know I wasn’t going to have that, so I convinced them to trust me.  They ended up eating two bowls each and asking to leave with the leftovers.

I hope you and yours feel the same way.  Just note that I am making this meal for three bottomless pits, so if you just want to give it a try, cut the whole recipe in half.  Also, for an easier one-pot method, see the notes below.

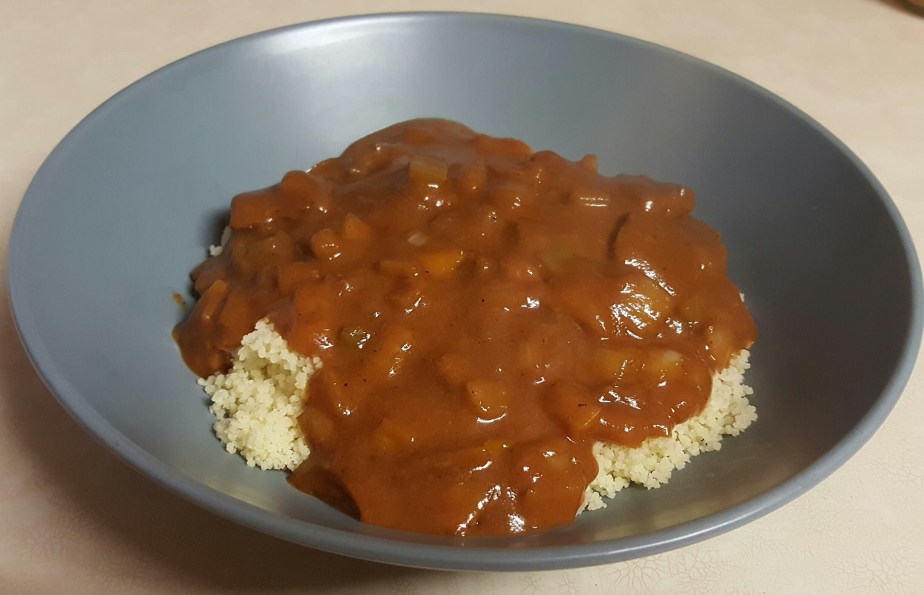
Chicken with Asparagus and Roasted Pine Nuts over Penne Pasta

Ingredients

16 oz cooked penne pasta (uncooked, if you choose the 1 pot method below)

32 oz canned chicken broth

1 cup pine nuts

4-6 boneless, skinless chicken breasts, cubed

4 TBSP olive oil

4 cloves garlic, minced

1 1/2 lb asparagus, cut into 1 inch pieces

1 1/2 – 2 cups grated parmesan cheese

Directions

Toast the pine nuts in a dry skillet until golden brown (try to avoid the urge to walk away and do something else, lest you end up with the chocolate chestnut color I normally do) and then remove from heat.  Set aside.

Stir fry your chicken in 2 TBSP of the olive oil on medium high until no longer pink.  Remove from heat. *

In a large pot heat 2 TBSP oil on high and saute garlic 2-3 minutes.  Add broth and heat to a gentile boil.  Add asparagus, reduce heat and simmer until tender, about 10 minutes.  Toss chicken, cheese, pine nuts and pasta together in the asparagus pot and mix well, adding salt and pepper to taste.  Serve and enjoy.

*One pot directions

I know this is unconventional, but that is just how I roll people…At this point (remember that we’re using a large pot here), drain the chicken, placing it on a plate, and keep warm.  In the same pot, add 2 TBSP of oil and roast the garlic 2-3 min.

Place the chicken and broth back in with the garlic and add extra broth or chicken bullion and water (enough to cover the pasta and asparagus about 5-6 cups total) directly to the pot with the chicken and bring to almost a boil.

Add the uncooked pasta, asparagus, 2 tsp garlic salt, 1 dash poultry seasoning and salt and pepper to taste.  Bring to a gentle boil, stirring often, and cook until pasta and asparagus are tender, 11-13 minutes.

Drain extra liquid and stir in the cheese and pine nuts.  Serve and enjoy.

Note: I love it this way because it gives the pasta a great flavor, making it part of the meal and not just “filler.”

Easy, Peazy Pizza Bread

If you’ve ever been in a hurry or just plain tired at night (always my issue), then you know that a home cooked meal can be a rather daunting prospect.  Have no fear.  This easy meal will be a crowd pleaser and will take almost no prep.  You can prepare your own pizza crust or use a store bought tube.

I believed I’ve mentioned that I tend to shoot from the hip in the kitchen, so I would be lying if I said I stick to the following ingredient list.  I made my own pizza sauce with a bit of pesto for a little extra pizazz, but store bought works fine also.  Adjust to your tastes as needed and have fun.

Pizza Bread

Ingredients

1 tube or homemade pizza crust

1 small pack of pepperoni slices

1/2 cup shredded mozzarella cheese

1/8-1/4 cup shredded Parmesan cheese

3 TBSP pizza sauce

garlic salt to taste

1 egg + 1 TBSP milk, beaten together for egg wash

cornmeal

Directions

Preheat your oven to 375 degrees and grease a cookie sheet, sprinkling with cornmeal.

Roll pizza dough on a counter top sprinkled with cornmeal, forming a rectangle.  Spread the pizza sauce on the dough, stopping 1 inch from the edges and top with cheeses and the pepperoni.  Sprinkle with garlic salt, if desired.

Pizza bread 3.jpg

Brush egg wash along the long edges and what will be the outside seam of your bread, then roll, short edge without egg wash first, into a log.

Place seam side down in the center of greased cookie sheet and brush the outside of the rolled bread with egg wash.  Sprinkle with garlic salt, if desired.

Place in your 375 degree oven for 25-35 minutes, until crust is golden brown.  Remove from oven, cool slightly, slice and enjoy!

Pizza bread 5.jpg

Pizza bread 6

Cakes: the Good, the Bad, the Ugly and the Inedible

To honor a few requests to do so, I dug this bad boy out of the archives.  Enjoy!

Yesterday was Jamie’s birthday and I managed to throw a cake together with items I had on hand.  I only had a couple of hours before he came home from his last day of school, so I knew better than to get crazy.  This got me thinking about the cakes I’ve made over the years and how a few episodes of Cake Boss had me convinced I could be a pro without of lick of training.  I have had a couple of successful-ish attempts, but lest you think I suffer from delusions of grandeur, I will come clean today.

My favorite blog is cakewrecks.com and I’m sure that, were I a “professional” baker, I would be heavily featured on Jen’s list of the worst.  For twenty years, while on any project, I have reminded myself of the words my friend Carrie once spoke to me; “You have a tendency to get a little carried away and go over the top.  Not always in a good way, so put the paint brush down.”  Or something like that.  Though I’m sure I was offended at the time, truer words were never spoken.  While I try to remember these words, I only listen to them about 50% of the time.  Sometimes, it’s okay to run to the store and buy a cake.

So today I take you on a journey of discovery, mild success and embarrassment that will hopefully not drive you away from this blog forever.  Hey, I never said I could bake.  I just cook and build stuff.

The Frightful Fairway

Jamie's golf cake

This may have been my first attempt at working with fondant and if I’m not mistaken, I was pretty proud of this travesty.  From the shiny, drooping golf bag to the worm-like bridge over the stream and the overall lumpy shape, I look back on this one with shame.  Even my Finnish flag is sad and you would think it would be tough to screw up a blue cross (Jamie’s family is Finnish).  Hey, I like the graham cracker sand traps though.

The Hunting Horror

Bubby cake

I was asked to do this one for my late, great uncle’s 80th birthday and ultimately, I was pretty proud of it.  I thought the deer, sleeping hunter and other little touches turned out fairly cute, but the cake tasted, um, not great.  The fondant I used killed any hope one had of actually tasting the cake or frosting (I have never found a fondant recipe I like and I will gladly accept any and all suggestions).

Thankfully, my family is kind and professed to love it, but I wasn’t fooled.  A toilet paper cake may have been more palatable.

The Tortuous TARDIS

Tardis

Though technically not a cake, this gingerbread TARDIS was a pain in the keister to make, but I was proud of it.  Upon further inspection, however, I realized that the actual TARDIS is not quite as lumpy and misshapen as my gingerbread version, nor do brown bits show through anywhere on the original.

If memory serves (I haven’t watched the show in a couple of months), the real TARDIS also had a light on top which does not resemble a blue nipple-tipped boob you see here, but I could be wrong.

And don’t even get me started on my handwriting.

The Minecraft Mess

A 2014

Andrew begged me to make him a Minecraft cake a couple of years ago and since he’d never asked for a specialty cake before, I was happy to do it.  One would think that blocks and simple construction would be a breeze, but that did not prove to be true for me.  My fondant handicap struck again and I ended up with a mess of uneven squares and a general appearance of chaos.  I even placed it on the busiest platter I own to finish the assault on the eyes that was this cake.

Thankfully, Andrew approved and it actually tasted fairly decent.  At the very least, we had a sugar rush for breakfast over the next couple of days.

The Mommy Massacre

Mom 2014

My mother, like all mothers, God bless them, will sing praise to this cake all day long, but I know the truth.  It’s hideous.  This was supposed to be a representation of my mom and some of her favorite things, but her modeling chocolate double ended up looking like the love child of Charo and Steven Tyler (my actual mother resembles neither).

In my defense, my parents were scheduled to arrive at our house to celebrate at 6pm, but my father is a “do it now” kind of guy and Mom called to say that they would arrive between 2 and 3.  I hadn’t made any of the figures at this point and I panicked, rushing to finished this shiny, sloppy mess.

The Mediocre Motocross

D cake

I think this one may have been my second attempt at fondant, still tasting “meh,” but I liked the look of it, for the most part.

Again with the shininess, but overall, I can’t hate on it too much and my son loved it.  I don’t know that I would want to stick plastic toys into a cake again, but this theme was a great way to salvage cake that had fallen apart coming out of the pans.

The Buttercream Blitzkrieg

20151107_221219.jpg

Time and time again I find myself rushing to finish a cake because I love to play and I’ve convinced myself it’s less expensive to bake a cake than buy one.  Somehow I forget the four trips to the cake decorating store usually required.

Anyway, this is another one that I threw together for my mother in a day.  The store-bought buttercream was so soft and would droop, leaving gaps where the cake peeked through.  Genius that I am (can you hear the sarcasm?), I added more icing on top to fill in the gaps left by the ribbons heading south, ending up with an inch-thick frosting layer around the sides of the cake.  Don’t even get me started on the ribbon quality or color choices.

Thankfully, my mother and I love icing and I skipped the fondant, so this one at least tasted yummy.

The Fondant-Free Football

A 2015

I admit to being somewhat proud of this one.  Crooked stripes and imperfect oval aside, I think I delivered what Andrew asked for on his last birthday.  The best part was that I stuck to my guns, abandoning fondant and going with straight buttercream, so it actually tasted great.

I was able to use a mesh laundry bag (bleached and clean) to leave the tiny pigskin pattern in the buttercream, further convincing me that my decision to walk away from fondant was the right one.

 The Ugliest of the Ugly: The Loathsome Last Minute

Okay, here we go.  This last cake is so bad that I almost didn’t include it.  I would love to tell you that I made it years ago and didn’t have any experience, but sadly, I made it for Jamie’s birthday…yesterday, as I mentioned earlier.  I had two hours, during which I was working on some other projects, so I was spread a little thin, but I opted to bake rather than buy.  I am an idiot.

I had a strawberry cake box and strawberry frosting in the pantry that I had picked up for emergency quickie cupcakes, so I got to work.  The baking and stacking went fine, but my first mistake was putting the cake together in a box too small to fit my decorator tips into, let alone my hands.  Two sides of the cake were unreachable, so I was dropping the icing in from about three inches high.

Again with the store bought icing.  I had to try to turn pink icing into something more “manly,” but after an hour of blending reds, I got bupkis.  Still pink.  This is when I decided it was over and that I would go straight “eye sore.”  I decided to decorate the whole thing with my runny frosting and use some black cake spray paint I had gotten a little while ago.  The ribbons…ugh, I can’t even.

So, yeah, I totally gave up and decided I actually was in the pursuit of not just eye sore, but completely ugly.  I mean, who doesn’t like a good laugh, right?  Okay, okay.  I’m done making my excuses.  Prepare yourself.

I give you the poopy, brown mess!

2016 J.jpg
At least it tasted ok

I suppose I will leave the baking to the pros.

No, I won’t.  Who do I think I’m kidding?

What’s the matter, Colonel Sandurz? CHICKEN?

Five points if you got the Spaceballs reference! 

Chickens.  Should you or shouldn’t you?

Several friends have approached me lately, thinking of getting chickens, but nervous about the unknown.  I thought I’d share our limited experience and ideas to address some of the issues holding people back.  We’ve been chicken folk for less than a year, but I hope through our fresh eyes, to either help them decide to take the plunge, wait or walk away.

For years Jamie and I have talked about raising chickens, but time restraints and insecurity kept us from taking the plunge.  Neither one of us had ever raised chickens and I had been raised by a father whose career largely centered around rodent and avian borne diseases, so the thought of salmonella, or worse, histoplasmosis terrified me.   We dreamed of daily fresh eggs, but had nightmares of illness and failure.

Last spring, when my beautiful nephew was born, my youngest son, Andrew, and I took a trip to Colorado to meet the little guy.  I stayed with my sister, her husband, her ethereally gorgeous daughter and the new guy, and was once again reminded of my brother-in-law’s incredible skills as a gardener and a chicken whisperer.

Holy cow!  Out of curiosity, I Googled “chicken whisperer” after writing this.  He’s real guy and he’s not my BIL.  Hmm.

They live on a smaller lot than we do, but you can’t throw a stick without hitting a chicken (I did not try this, btw.  Purely speculation).  Jamie and I had planned to have me bring some of their chicks back home, but he was going to be headed out to a new platform and so our chicken coop build plans were put on hold.  We had nowhere to keep them, which was an even better excuse than “we are scared senseless,” so we shelved the idea and I came home chickless.

Because he followed his uncle around asking countless questions, Andrew came home a bit of an expert on all things poultry.  I think this impressed Jamie enough to motivate him and I came outside to find him building the coop one Saturday morning.  We burned up the internet looking for tips and tricks for everything from coop ideas to feed recommendations (thank you, backyardchickens.com) and felt a little less insecure as we gained knowledge.


20151013_070910.jpg
Not finished, but occupied.

Finally, the day came.  We were fortunate enough to have one of Jamie’s friends give us 8 hens, plus a rooster, to start out and we were excited, but still nervous.  I honestly still thought it was a crazy idea; money, time, fear of illness to us, fear of illness in the birds, blah, blah, blah (apparently, I am a “fretter” in my old age), but we dove into our new life as chicken farmers anyway.

Surprisingly, it was so much easier than I expected it to be (of course, I was comparing the acquisition of 9 birds to my brother-in-law’s poultry army).  We soon found ourselves sitting out in the yard in the evenings, having dragged the porch swing out to the chicken area, sipping wine and watching the birds for hours…until the mosquitoes drove us into the house.  We often laughed at ourselves for finding chickens so mesmerizing, but they really are.

Bess
The vapors? 

Watching a chicken chase a bug is hilarious, and I’ve heard people say that seeing them drop down for a dust bath or to sun themselves is terrifying, but I have 2 Corgis, which means I’m used to this.  My dogs will fall or dive to the ground to roll in something exceptionally foul or just because they are happy, giving the appearance of being in the throws of a grand mal seizure.  My little Bess will fall over onto her back directly in your path (I’m fairly certain my eventual death will be from tripping over a Corgi), an episode only cured by belly rubs. Oh, look.  She’s having one now.

Anyway, the males in this house can eat eggs like they are going out of style, so not having to buy them anymore has been wonderful.  We have worked our way up to 3-6 eggs a day and that is perfect for us.  Sometimes we have enough to give to neighbors and sometimes we don’t, but we never run out.

20151013_070923
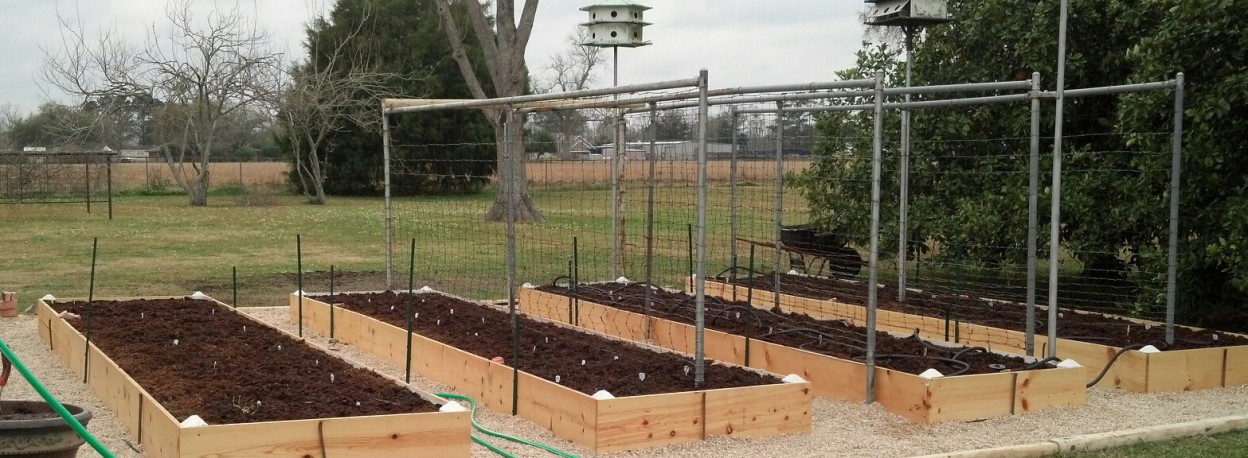
As for my fears about expense, they have proven to be unfounded.  For less than $30, we can feed the chickens for almost 3 months, which is less than what the 12-18 eggs a week I was buying at the grocery store were costing.  Using the outer wall of our existing shed for part of the coop helped keep costs way down as well, so the wallet wasn’t too wounded.  Additionally, Jamie built the ladders and roost out of branches from a tree I’d trimmed, which the birds seem to like and they didn’t cost a penny.

His brilliant nesting box design has made wearing our “poop shoes” necessary only on coop cleaning day and even the cleaning isn’t bad, especially with 2 strapping young sons to do it for us.  I bought the dish pans we use for $1 each at the Dollar Tree and they fit perfectly into the boxes.  Jamie is 6’1″ and just told me to make sure you all know that bigger is indeed better when it comes to a chicken coop.  No stooping or head-hitting for this guy.

We had heard from several people that their hens stopped laying during the winter months, so we put a light on a timer in the coop.  It goes on just before dusk and goes off at about 8:30 pm.  Other than the first week and one day when it was in the 30’s, we’ve never gone without an egg, so the light seems to be doing the trick.

Initially, we put a watering dish out there, but the mess was crazy.  I had purchased

20160225_201045-1.jpg
The water contraption

some chicken nipples (my boys find the name hysterical) on Amazon for about $1, so Jamie drilled some PVC pipe and placed them at the bottom.  The nipples (tee-hee) are on the horizontal pipe and the vertical pipe has a removable cap to fill the  L-shaped contraption.  Again, this is so much cleaner and easier than a bowl and the birds started using them right away, abandoning the bowl almost immediately.

I had also heard many horror stories about evil roosters, and had in fact been rather terrified of one of my brother-in-law’s, but luckily, Cogburn has proven to be rather mellow.  He crows a lot and at the oddest times; morning, noon, night, seemingly just because he can, but since the neighbors haven’t complained yet and he hasn’t ended up in someone’s stock pot, we don’t mind.

20160225_131936.jpg
Cogburn

One thing I really love about chickens is that they are ravenous insect eaters.  Since I live in an entomologist’s paradise, it’s fabulous to be able to release the flock and have them sweep the yard and garden, devouring all they can.  Yes, they scratch and can tear up the grass, but the dogs and I move them around before they can switch from ants in the yard to plants in the garden or dig to China.  This little army of bad a$$es even eats fire ants, so that right there makes it all worthwhile.

Because we have so many live oaks on the property, we are constantly battling leaves, as they basically drop them all year (oak leaves are to Jamie, as gophers were to Bill Murray’s character in Caddy Shack).  Knowing their skills for scratching and hunting down insects, J started dumping leaves into the chicken area.  They seem to love it, digging for insects and tossing leaves all day long.

Lastly, we love leftovers around here, but on the third or fourth night in a row, even my best chili or gumbo isn’t terribly attractive.  Nowadays, I am free to toss food without guilt because chickens will eat anything.  In fact, some of our best laying days have been when I had a healthy amount of food to clean out of the fridge.  I love to watch them get excited when I come out carrying Tupperware, but I’m not as devoted as Jamie, who will actually make them hot oatmeal on cold mornings.  Yeah, it’s kinda cute.

I almost wish we hadn’t waited, but I think the stress of having chicks would have been a bit much for we novices.  I’ve actually been begging him to get more, but we need to save to fence the rest of the yard.  We live on a large lot, but it’s on a corner and people sometimes shortcut down our road, driving way too fast.

I don’t profess to being an expert and I’m sure it won’t all be smooth sailing, but if you are thinking about raising chickens, go for it.  I hope you’ll enjoy it as much as we do and if you think I’m crazy for saying we enjoy “chicken gazing,” well, I’m crazy for many reasons.  I have children, after all.


Not your Grandma’s Chicken Wraps

Not long after adopting the boys and moving to the Western Slope of Colorado, I realized that I had to get a life.  No, seriously.  I was home with the kids 24-7, after traveling for years with my job and the trauma they had experienced before they came to us made things very emotionally and physically draining.  Most importantly, my guys were 4 and 2 and needed the socialization that a few hours in day care would provide.

I looked for a part time job and ended up landing one as the kitchen manager at one of the most beautiful golf courses I’ve ever played at (honestly, I initially chose it because I wanted the free golf) and I loved it.

image credit: 

The downside was that the food offered was criminal considering the setting; frozen beef patties or chicken breasts, fries, chips and such.

You’ve probably realized by now that I can’t abide by boring food and with an entire restaurant kitchen at my disposal, I began to play.  I’d had enough and that’s how the chicken wrap was born.  An instant hit!

I think I’ve replicated the recipe, but I’m not positive.  In the kitchen I might look like I know what I’m doing, but I’m usually winging it; running around, stirring, tasting, chopping and adding…and adding.  People ask for recipes all the time and I usually look at them like a deer in the headlights.  I normally have little to no idea what I did, so that’s been the biggest challenge with this blog.  I’m almost embarrassed to post this recipe with all the “optionals,” but this is how I roll.

I used 4 chicken breasts for this, but you could do 3 and cut the seasoning back a tad.  I am feeding growing boys and a 6’1″ husband, so it’s a crapshoot these days.

Also, realize that I try to tame down my seasoning in these recipes, so feel free to taste and add extra.  Lord knows I do and you won’t hurt my feelings.  The optional ranch dressing, lettuce, cheese and tomato can really tone things down if the heat creeps up on you.

***********************************************************************

Chicken Wraps with Old Bay

Ingredients:

4 chicken breasts, sliced or cubed

1 onion, sliced or chopped

1 bell pepper, sliced or chopped

2 TBSP butter

2 TBSP olive oil

3 TBSP Old Bay Blackened seasoning

1 TBSP Tony Chachere’s Creole seasoning

2 tsp garlic powder

salt and pepper to taste

4-6 drops Tabasco Chipotle Sauce (optional)

8-10 Large, burrito flour tortillas

Optional garnishes:

Shredded lettuce

Chopped tomato

Shredded cheddar cheese

Ranch dressing

Directions:

On a large griddle, or in a large skillet, melt the butter over medium-high heat and then add the onion and bell pepper.  Saute, stirring until softened, about 10 minutes (less if you like a little crunch and your kids aren’t going through the “I hate onion” phase).

Add the olive oil, then chicken and cook until little pink is showing and liquid begins to collect in the pan or on the griddle, about 3-5 minutes, stirring.

Add the Old Bay, Tony’s, garlic powder, Tabasco, salt and pepper, stirring to coat all chicken pieces.  Continue cooking until chicken is no longer pink in the center, about 5-8 minutes.

I like to drain most of the liquid at this point, add about 1 TBSP of butter, stir and throw extra seasoning into it, if needed, but that’s all optional.

Place cooked chicken, onions and bell peppers onto a warmed tortilla and garnish with cheese, lettuce, tomatoes and ranch dressing; roll and enjoy.


Sew You’re Tired of Working in Solitude?


Three and a half years ago, having sewn only a few buttons back on since Junior High, I decided I needed to get myself a sewing machine.  I was becoming a canner, a gardener, a plumber, a painter and such, so I decided to add seamstress to the list.  Sadly, after purchasing an inexpensive machine on Amazon, I realized that our old house was only 1000 square feet, with nowhere, I mean nowhere, to fit a machine.

The poor, abandoned Brother longingly called to me from its place of solitude and neglect in the air conditioned little pump house where I was forced to store my canning.  Its box, never opened, collected dust and when we finally moved to the bigger house, I swear it was lighter with the excited anticipation of finally being released from its prison!

Alas, this was not to be.  It was three years, almost to the day, before I took out a box cutter and unleashed the beast.  I was building a cat tower for my brother and his fiance and I couldn’t find the right pillows for the houses, so I decided to try my hand at sewing my own.  I’m telling you right now, it wasn’t pretty and there will be no pictures of those pillows.

Anyway, I sewed my own and they were functional.  I then decided to make an easy fur cape for my niece.  Ha!  Easy?  Um ,no.  I chose fleece and made it reversible which was crazy, overly ambitious for a first attempt at a garment (Luckily, she is five and easy to please).  I sewed gift bags and stockings for the holidays, mended some clothes and the ball was rolling.

I soon realized that with my new hobby came the loneliness of confinement to the dining room, as that was the only available table.  I priced sewing tables and almost fainted at the prices I found.  A machine which cost less than $200 most certainly did not belong on a $1000 table, so I figured I would build my own.  As I often do, I was flying by the seat of my pants, a plan in mind and even a sketch with measurements, but the seat of my pants nonetheless.  I wanted somewhere to keep the machine without constantly having to move it out of the way and would allow me to still be in the same room as the rest of my family.  Here’s what I came up with:

20160224_091259

I put this little table on casters so I could move it around and added three drop leaves for plenty of work room.  Currently, it resides in our living room, behind the couch which allows my ADHD to run free during family movie night, for example.

It’s not quite finished yet (it needs another sanding and coat of paint), but it is very functional and that was the goal.

I’ll show you the specifics and give you some ideas if you are thinking of building your own.  Sadly, my original sketches and measurements are all gone, but I can answer questions, should you have any.

The first thing I did was to make sure I had strong boards and framing to work with.  I just grabbed a couple laminated pine boards from Home Depot and already had the 2×4’s, 2×2’s, 1×2’s, hinges (save the long ones) and screws at the house from previous adventures, so shopping was relatively painless.

I built the frame of the table using 2×4’s and 1×2’s, using salvaged slats from old projects for the base.  I had built the hideous box you see underneath in a successful, if not pretty effort to organize my sewing paraphernalia a few weeks prior, but it weighed a ton so the base had to be very strong.
20160224_090129

Before attaching the table top, I traced the outline of the machine, making sure to leave room for the cords and to access the power switch.  I then cut out the area with a jigsaw, making sure the machine would fit before attaching to the table.  Underneath the large cutout, I used a solid board and drilled holes through which the cords for power and the foot pedal could run.

My original plan was to have one drop leaf on the left side of the table where I could place the materials I fed through the machine.  Having the small zoo that we do, it’s vital to keep things off of the floor since, no matter that I vacuum daily, I could knit sweaters with the cat and dog hair collected.20160224_085906-1

I attached the leaf with a long hinge and the leg with a smaller hinge.  I knew I had to get creative here because this leg was too long to simply fold up, so I had to cut the leg in half and hinge that as well.  This particular part of the project almost drove me to drink, which is why I always recommend that, when you reach this point, you walk away.  Take a hot bath, eat something, scream into a pillow, whatever it takes to keep your head from exploding.

Anyway, this is what I ended up doing:

Again, not pretty, but functional.

Not sufficiently aggravated by how long it took to come up with this part of the table, I decided to add an even bigger leaf which I could use for cutting, etc.  This one would need two legs, but thankfully was big enough for the legs to be hinged only to the table and did not to require my going full-MacGyver.

If you know me, then you know I wouldn’t last five hours in the desert.  Not because I’m not a total bad a$$ survivalist, but because I cannot go half an hour with a drink of water.  This prompted the need for a small drop leaf on the right side of the table where I could keep my water, my phone and other items.

Because I was trying to be frugal and the leaf didn’t need to be very large, I used the small board that I had left from cutting the rest of the table tops.  Knowing myself all too well, I also knew this leaf had to be lower than the others, keeping my glass and other items out of the reach of my unparalleled ability to spill and break things (lost my phone insurance twice for too many claims after shattering screens by briefly removing the cases to clean the screen.  Who knew two claims a year was the max?  And don’t even get my husband started on all the liquid I’ve spilled over the last fifteen years).

There was no way to get a leg attached to this leaf since it would have needed to be very short and I wasn’t going through a repeat of the hinge battle which had raged within me on the left drop leaf.  After much debate, trial and error and more than a little cursing, I ended up with the following:

And that’s it.  I strongly recommend giving this a shot if you are in need.  The whole project cost me less than $120 and took little time to complete.  It’s been nice to feel like I’m still a part of things with the family, even when I’m on the machine for hours, and I love the flexibility of this thing.

Here it is again in it’s full glory:

20160224_090439-1


Pepper Steak Unleashed!

Pepper steak.  Two words that often fill me with dread when I am eating out.  I am not trying to be insulting, but most of my experience in restaurants or at other people’s homes have been with a bland, flour and ketchup flavored mystery stew of some kind; slivers of green pepper and onion mocking me with their ability to surrender all flavor, defying all logic.

Of course, the truth is that my mother ruined all other Pepper Steak for me with the following recipe.  Other kids, when asked what they would like for their birthday dinners, usually request pizza, cheeseburgers, etc.  Me?  My go-to meal was always Pepper Steak…well, Mongolian Hot Pot first, then Pepper Steak (we’ll get to Mongolian Hot Pot another day and you will thank me).

I was lucky enough to travel the world with my parents throughout my childhood.  As Peace Corps volunteers first, and then following my father, a biologist, chemist, wildlife specialist and world leader in his field, we scoured the globe to eliminate diseases in underdeveloped countries like the Philippines, Africa and Bangladesh (he’s still at it today in his late 60’s and is, in fact, in India as I write this). We lived in, and visited, some of the most amazing places on Earth.  My mother, like me, loved to learn new cultural cuisine, and I am blessed to have had her pass some of it on to me.  Especially, the following recipe!

In my home, Pepper Steak is in high demand as a comfort food.  We will often use a food processor for the veggies and cut the meat smaller so we can curl up with a bowl and savor it with a spoon.

Today’s recipe (only slightly tweaked, Mom) will be a party in your mouth and tummy.  Enjoy!

The recipe is repeated at the bottom, sans pictures for printing and be sure to check the Notes section.

***********************************************************************

Pepper Steak Unleashed

Ingredients

1-1.5 lbs beef, cut into 1 inch strips or cubed (stew meat or your choice steak will work)

1 1/2 cups all purpose flour

1 TBSP + 2 tsp Tony Chachere’s Creole Seasoning, separated (1)

1 tsp +  1 tsp garlic powder, separated (2)

2 tsp + 1 1/2 tsp black pepper, separated

3 TBSP olive or other cooking oil (enough to coat the bottom of your pan and prevent burning)

4 cups water

2 yellow onions, sliced thinly or finely chopped

2 bell peppers, sliced thinly or finely chopped

1 cup ketchup (3)

1 cup unsalted tomato sauce (3)

2/3 cup soy sauce

1/3 cup peanut butter  (4)

Package Cous cous, rice or egg noodles, prepared  (5)

Directions

In a large Zip Loc bag or Tupperware container, combine the flour, 1 TBSP Tony’s, 1 tsp of the garlic powder and 2 tsp of the black pepper.  Mix well and add the sliced beef, shaking to coat all the pieces.

In a large pot, fry the dredged meat in oil over medium-high heat until nicely browned, stirring and scraping the bottom of your pot to prevent burning and sticking.  Add extra oil in small drops, if needed.

Peppersteak 7
Browning nicely!

Reduce heat to medium and add the 4 cups of water.  Cook for 30-40 minutes until meat is tender and liquid begins to thicken, stirring often to prevent burning and sticking to the bottom of the pot, adding small amounts of water, if needed.

When meat is tender, add ketchup, tomato sauce, soy sauce, peanut butter, onions, peppers, 2 tsp Tony’s, 1 tsp garlic powder and 1 1/2 tsp black pepper.

Peppersteak 10.jpg
Almost there!

Cook over medium or medium-low heat, simmering 20-30 minutes, until vegetables are tender and the flavors blend.

Serve over cous cous.

NOTES

(1) Though I’ve never made this without Tony’s, I’m told it can be done and can still be amazing, so give it a try, if you don’t have any.  If you are not adding peanut butter, you are making a mistake…I mean, you don’t need to add the remaining 2 tsp of Tony’s to your gravy, but just add to taste.

(2) Sometimes I will split the garlic powder with garlic salt.  It’s up to you because the soy sauce can kick the saltiness up.  Just remember that you are serving over cous cous or rice, so the flavor will be slightly diluted, so to speak.

(3) I have chosen to alter the original recipe because it calls for all ketchup and this was a little salty.  Again, you’re serving over cous cous, so it shouldn’t make a big difference if you choose not to use tomato sauce.

(4) Adding peanut butter gives the dish a uniquely amazing flavor you will not regret.  A bit of an African flair, if you will.  Leaving it out converts the dish to regular pepper steak, which is still good, but not the party on your taste buds that peanut butter starts.  Remember this is a dish which needs to cook for a while for the flavors to marry in perfection.

(5) Though you can serve this over rice or egg noodles, cous cous is the absolute best, especially when going the peanut butter route.  If you aren’t familiar with cous cous, it is yummy, light, tiny pasta available at most grocery stores, sold in a small box, or a large plastic container.  It is incredibly easy to prepare; just add it to boiled water, remove from heat, cover 5 minutes and fluff with a fork.   Cous cous


Peppersteak11
YES!!

***********************************************************************

Pepper Steak Unleashed

Ingredients

1-1.5 lbs beef, cut into 1 inch strips or cubed (stew meat or your choice steak will work)

1 1/2 cups all purpose flour

1 TBSP + 2 tsp Tony Chachere’s Creole Seasoning, separated (1)

1 tsp +  1 tsp garlic powder, separated (2)

2 tsp + 1 1/2 tsp black pepper, separated

3 TBSP olive or other cooking oil (enough to coat the bottom of your pan and prevent burning)

4 cups water

2 yellow onions, sliced thinly or finely chopped

2 bell peppers, sliced thinly or finely chopped

1 cup ketchup (3)

1 cup unsalted tomato sauce (3)

2/3 cup soy sauce

1/3 cup peanut butter  (4)

Package Cous cous, rice or egg noodles, prepared  (5)

Directions

In a large Zip Loc bag or Tupperware container, combine the flour, 1 TBSP Tony’s, 1 tsp of the garlic powder and 2 tsp of the black pepper.  Mix well and add the sliced beef, shaking to coat all the pieces.

In a large pot, brown the dredged meat in oil over medium-high heat until nicely browned, stirring and scraping the bottom of your pot to prevent burning and sticking.  Add extra oil in small drops, if needed.

Reduce heat to medium and add the 4 cups of water.  Cook for 30-40 minutes until meat is tender and liquid begins to thicken, stirring often to prevent burning and sticking to the bottom of the pot, adding small amounts of water, if needed.

When meat is tender, add ketchup, tomato sauce, soy sauce, peanut butter, onions, peppers, 2 tsp Tony’s, 1 tsp garlic powder and 1 1/2 tsp black pepper.  Cook over medium or medium-low heat, simmering simmering 20-30 minutes, until vegetables are tender and the flavors blend.

Serve over cous cous.

NOTES

(1) Though I’ve never made this without Tony’s, I’m told it can be done and can still be amazing, so give it a try, if you don’t have any.  If you are not adding peanut butter, you are making a mistake, I mean, you don’t need to add the remaining 2 tsp of Tony’s to your gravy, but just add to taste.

(2) Sometimes I will split the garlic powder with garlic salt.  It’s up to you because the soy sauce can kick the saltiness up.  Just remember that you are serving over cous cous or rice, so the flavor will be slightly diluted, so to speak.

(3) I have chosen to alter the original recipe because it calls for all ketchup and this was a little salty.  Again, you’re serving over cous cous, so it shouldn’t make a big difference if you choose not to use tomato sauce.

(4) Adding peanut butter gives the dish a uniquely amazing flavor you will not regret.  A bit of an African flair, if you will.  Leaving it out converts the dish to regular pepper steak, which is still good, but not the party on your taste buds that it starts.  Remember this is a dish which needs to cook for a while for the flavors to marry in perfection.

(5) Though you can serve this over rice or egg noodles, cous cous is the absolute best when going the peanut butter route.  If you aren’t familiar with cous cous, it is yummy, light, tiny pasta available at most grocery stores, sold in a small box, or a large plastic container.  It is incredibly easy to prepare; just add it to boiled water, remove from heat, cover 5 minutes and fluff with a fork.


Simple Shelving Saves your Sanity

I may have established the fact that I am rather OCD in certain areas.  The older we get, the more crap we accumulate, the more we clean, the more your family comes in behind you and messes it up.  I am learning that in order to get everything put back in its place without having to daily go full-on Mommie Dearest, I had to provide items with their very own place.  And so my life as the female Bob Villa began.

Today we’re going to talk about this:

Dishes

Yes, the dreaded moment you realize everyone and their brother has at least three water glasses going at once…or didn’t take care of their dirty dishes (I can’t help you with the latter, because I’m still working on that here).  I was starting to go a little insane, so I decided to make a place for these and other small items.  There isn’t much wall space in my kitchen at all, so I went pretty small, but I knew I needed shelves.  I can’t tell you how much this has helped!  The dishwasher isn’t full of glasses everyday and I haven’t heard an, “Hey!  That’s my cup!” argument in ages.

Finished Pr
ID badges, cups and chore lists have a home!

These took less than an hour to build and paint and are the most practical shelves I’ve put into the house.  They are easy and I will walk you through all the steps you need.  I am going to speak to the beginners among us, so skip over the detailed parts if you’re advanced.  These will be 5.5 X 7.5 shelves, but you can adjust size slightly, if needed.  *Please see note below for questions.

For this project you will need the following:

  • Drill
  • Level
  • Stud finder (if you have one)
  • Tape measure and speed square, if available
  • 8 to 12, 1 1/2-2 inch screws
  • .5-1 inch screws, or nail gun & air compressor with 1-1 1/2 inch nails
  • Wall anchors (pictured below)
  • PENCIL!!! (don’t put it down)
  • 2 six foot 1×2’s for supports
  • Board for shelves at least 6 inches wide by 32 inches long
  • Miter saw or nice people at Home Depot
  • Wood glue

tool set 2


Simple tools for this job.

flip

flip tip


The flip drive pictured above is a great tool to have if you don’t want to switch tools or bits during the job, but a drill bit and a screw bit will work as well.

Step 1

Select the area on a wall where you would like the shelves.  Take your stud finder and locate the studs in the wall.  Use your level as a ruler and draw a level line where you would like your center shelf to go.  Make sure that at least one screw along the line will go directly into a stud.  You may have to pick a new spot if you can’t find a stud right where you want it.  Just make sure the area can accommodate a 7.5 inch shelf.

Line

Stud finder
Stud finder in action

NO STUD FINDER?  If you don’t have a stud finder, simply take your level and draw a line with your pencil, using your level as a ruler.

Take a thin nail and a hammer and tap holes through the wall along your line until you meet resistance, indicating a stud.  Mark the wall with your pencil (you put it down, didn’t you?), a few inches above the stud, lightly enough to be easily erased.  Don’t worry about the small holes in the wall as your shelf should cover them.

*

 Step 2

This is where you will need your miter saw, or a nice person at the hardware store to cut your wood.

miter
Miter Saw

Place your 1×2 on the saw and cut the 2 inch length at a 45 degree angle.  Measure 5 1/2 inches from the tip of your 45 and cut the other side at a 45 in the opposite direction.  Cut another 1×2 the same way, same length.

Perfect


You can check your work holding the pieces back to back like this:

Mea

Cut two more pieces of 1×2 the same way, but make them 7 1/2 inches long from tip to tip as shown above.  When you have all four pieces cut, you should be looking at a perfect picture frame.

45s

box
Not perfect yet.


Step 3

Run a small line of wood glue down the middle of the your 45’s and join the pieces together into that picture frame.  If you have a nail gun, pin your frame together, using a speed square (if you have one) to make sure your angles are correct, 90 degrees.

Square.jpg
Speed Square


If you don’t have a nail gun or pinner, you can take your drill and drill holes, using the smaller screws to put your frame together.  Be sure to countersink your screws if you want to hide them with paint later, as shown in the photos below.

countersunk             end 45s

If you do not have a miter saw, or don’t want to make 45 degree cuts, you can join the ends of your wood like the image on the right.Butted

Just be sure to adjust your measurements on your 1×2 frame to 2, 7.5 inch pieces and 2, 4 inch pieces.

Step 4

When your frame is put together and square, place it over the board you want to use for your shelf.  Most people measure, but OCD woman likes to trace for an exact fit.  If you want the frame to sit under the shelf (see left below), trace the outside of the frame onto your board.  If you want to hide your shelf inside the frame (see center below), trace the inside of your frame, using the straight ends of the board to help, if possible.  Like so:

Cut your board and make sure it fits within your frame, or squarely on top, depending on your method.  I wanted to hide my board (I was using scrap wood) so I used wood glue on the board edges and pinned it inside the frame.  You can also use thin screws and your drill.

Fit
Inside the frame and pinned, after painting and installation

Step 5

Your shelves are now built and you can paint them at this time, if you are using spray paint, otherwise, time to install.

Decide whether you want the frame on the top or bottom of the shelf.  I did the Mom and Dad shelves with the frames down for more room and the kids’ shelves with the frames up to prevent spills.

Hold the 7.5 inch side of your shelf on the level line you drew earlier, making sure that the line on your wall and the line of the shelf match perfectly.  Take your drill and drill holes for the 2 inch screws that will hold the shelves, being sure to drill through the wall side of your frame, into your stud and wall and countersink your holes.

I was lucky enough to have two studs close together, but I had to angle my screws (below)

CS.jpgThey aren’t pretty, but c’est la vie.  Anyway, if you don’t have another stud, you’ll need to use anchors.

These are available everywhere and give added stability to a screw going into straight drywall.  You’ll need to drill the hole larger (package will indicate hole size needed) and then you will screw in the same way you will to your stud.  DO NOT use an anchor in a stud, as it is not necessary.

asst anchors.jpg
Assorted anchors
Anchor.jpg
Anchor


Now you can screw your shelf into the wall, being careful to keep it level, double checking with your level.  Once your screws are in tight, but not too tight, spackle to hide them and any other area which needs it; let dry and paint.  Voila!
Finished Pr

***********************************************************************

*NOTE: Building these is vastly easier than describing how to do it, so if you have any questions, please ask them in the comments.  Also, my computer seems to have lost its mind today, so if this looks like it was put together by my ten-year-old, I’m sorry.


Fried Chicken with Thai Sauce

If you know me well enough, you know that I loathe fried chicken.  I know that’s sacrilege coming from a Southern girl, but I can’t help it: the greasy chunks of breading, the fear of finding pink at the center of a big bite of drumstick or the chance it is over cooked and I could lose a tooth, all make my stomach turn.

Sadly (or so I once felt), the males in my house adore fried chicken, especially the kids, so I decided to play one day.  The end result is the recipe below and it changed my status from fried chicken hater, to big fan.  Seriously, it’s a wee bit healthier than straight-fried (in that the bulk of the oil is drained on towels and in the oven.  Ok, just go with me on this) and it is cause for great celebration in this house when I announce that’s on the menu.  The crust is perfect, but the sauce is the kicker.  I received a very strange look from J last night when I cleaned my plate and told him I could bathe in this sauce.

Enjoy!

Fried Chicken with Thai Sauce

Thai Fried
Look at me.  I’m beautiful. 
Ingredients

1 1/2 cups flour

1 can coconut milk

1/3 tsp salt

1/2 – 1 tsp garlic powder

1/2 – 1 tsp ginger

1/4 – 1/2 tsp cayenne pepper

4 lbs chicken breast, cut into 2 inch strips, or drumsticks, or a mixture

Peanut oil for frying.  Other oils work as well.

Place half of the flour (I will often throw a little Tony’s into this first bowl) into a bowl and the coconut milk into another separate bowl.  In a third bowl, mix the salt, garlic, ginger, cayenne and the remaining flour, combining well.*  Dip the chicken in the plain flour first, then the milk and last the seasoned flour mixture, coating well.

In a large stovetop or electric skillet, fry the chicken in batches until browned with a nice golden crust; move to paper towel to drain.  I learned to only do 5 or 6 pieces at a time to better maintain a frying temperature between 350 and 375 degrees.

Transfer to a greased baking dish, or, to maintain the best crust and for easier clean up, cut wax paper to fit the bottom of a cookie sheet and spray lightly with cooking spray.

Bake at 400 degrees for 25-35 minutes depending on the thickness of meat.

Sauce
Ingredients

1 cup water

1/3 cup packed brown sugar

1/4 cup soy sauce

1 TBSP + 1/2 tsp corn starch

2 tsp rice vinegar

2 tsp peanut butter

1/4 tsp cayenne

1/4 – 1/2 tsp ginger

3 TBSP finely chopped, fresh cilantro (dried does fine in a pinch)

Combine all but cilantro into a small sauce pan.  Bring to a boil and stir for 2 minutes until sauce thickens.  Remove from heat, stir in cilantro and pour over chicken.

* I will often double the recipe for the seasoned flour, reserving half for when the coconut milk renders the mix too chunky.  The finer flour adheres much better for a nicer crust that stays on the chicken through the entire cooking process. 

TFC
Another look at the breast chunks, since the drumsticks disappeared before I could photograph them.


Salisbury Steak with a Creamy Mushroom Gravy

When we decided I would stay home with the kids, I soon realized that simple domestic chores were not enough to keep my busy brain occupied.  Not that those chores didn’t demand my full-time attention, but ADHD is a relentless companion.  Without constantly learning and doing, depression can creep in, especially when you are a post-menopausal adult woman (yes, it happened early)…SQUIRREL!!!

Um, okay, so thanks to the magic of the internet I’ve been able to learn a lot.  Plus, when your husband is gone for two weeks at a time and you’re watching your pennies, it pays to learn to install a new toilet, faucet, sink, etc. yourself.  When I ran out of renovations at the old house, I turned my full attention to trying new things in the kitchen.  The day my youngest asked for the “gravy hamburgers” they served at school, I set my sights on learning to make Salisbury Steak.

I’ll be honest, I’m nursing some nausea due to the antibiotics I’m on for a sinus infection, so the thought of Salisbury Steak makes my stomach turn, but only for a second.  It’s one of those foods that takes me back to the school cafeterias of my youth, staring at a nasty looking, gelatinous gravy, smothering a flattened, unidentifiable meat puck.  Inside my heart would leap, pretending to hate on the outside, but rejoicing on the inside.  I admit it was a guilty pleasure and I went decades without, but I will no longer deny that I love it.  I hope your family does too, so without further ado…

***********************************************************************

First, let’s talk seasoning.  You will see “Tony’s” in many of my recipes.  Tony Chachere’s (pronounced ‘”sash-er-ees in the Cajun way to thwart true French pronunciation on certain words) is a Creole seasoning available in grocery stores throughout the country now, or online.  It’s a blend of many different herbs, salt and pepper, but is also available in a salt-free version.  We use it on everything because it is amazing; no real heat to it, but it starts a party in your mouth immediately.  You will never be able to eat pizza without it again.  You’ve been warned.

Tonys
Little, green can of magic.

I’ve also grown rather fond of roasted garlic salt when I don’t have time to roast my own garlic, or I’m simply feeling lazy and this one is quite good.

Garlic

 Salisbury Steak with Creamy Mushroom Gravy*

Ingredients:

2 pounds ground beef

1/3 cup plus 1 TBSP crumbled Ritz, or similar crackers

1 tsp salt, or less, if you’re not a fan

1 tsp black pepper

2 eggs, beaten

4 TBSP minced onion

1 tsp poultry seasoning, divided in half

6 TBSP butter

8-16 ounces of canned mushrooms, with the liquid (depending on your feelings for mushrooms, you can replace with 1/4 cup milk or water, if need be.)

6 TBSP all-purpose flour

6 Beef Bullion cubes (yes, that’s a lot.  Sodium intake for today is taken care of, but I suppose you could hold back a few)

6 cups of milk

1 tsp Tony’s (If you don’t have any, do not fret.  The flavor will not suffer) 

Garlic salt to taste

Directions:

In a large bowl, combine the ground beef, eggs, cracker crumbs, onion, salt, pepper and 1/2 tsp of the poultry seasoning.  It wouldn’t be a terrible idea to throw in a dash of the Tony’s and roasted garlic salt, if available, at this point.  Mix with your hands until ingredients are combined without overworking the meat.  Shape the patties, usually 6-8, keeping them around half an inch, but no more than 1 inch thick.

Place the patties in a large skillet and cook them over medium-high heat, being careful not to burn them, usually 4-6 minutes per side, turning until they are browned and cooked through to your taste.  Do not press the patties flat while cooking, as this robs them of their flavor and can make ground beef taste dry.  Drain the grease and place the patties on a plate, making sure to keep them warm.

In the same skillet, melt your butter and then add the mushrooms with liquid.  Stir and cook for about 3 minutes and then sprinkle the flour in, mixing until no lumps appear.  Add the bullion cubes, remaining 1/2 tsp of poultry seasoning, Tony’s, a dash of the garlic salt and slowly, the milk (you can add a bit less if you like a thicker gravy).  Cook and stir over medium heat until the gravy is smooth and starts to thicken.  Add salt and pepper to taste and then return the patties to the gravy, cooking on low heat, uncovered for 10 minutes, stirring occasionally.

Serve over egg noodles, rice or mashed potatoes.

*You can cut the gravy in half if you want the meat to stand alone, but living in Louisiana makes us gravy folk.  I do however recommend the egg noodles since they are lighter.  We like our gravy rather thick and it hugs the noodles quite nicely!