As our family life gets crazier, jiu jitsu keeps us busier, and my growing boys eat more like small horses, I’ve realized just how hard it is to snack healthy. Add to this the alerts going out on social media daily telling you that everything from chicken to cereal will give you cancer, or simply drop you where you stand, and a mom starts to think more about finding healthier alternatives to daily favorites. No, I’m not cowering in fear, but you guys know I like to take on projects, so this month I decided to try my hand at a favorite around here- breakfast tarts 😉
I did some research and found a recipe on tablespoon.com which seemed fairly simple. I just did things a little differently…and will in the future. I think next time I will make my own crusts so these are a little easier to shape. I never claimed to be a baker and I think my additions to the recipe will attest to this.
Homemade Pop Tarts
Ingredients
1 box refrigerated pie crust (2 layers)
1 small jar strawberry preserves (good quality) I used blackberry that we made last year
1 cup powdered sugar
2 teaspoons milk (2 – 3 tsp)
Directions
Preheat the oven to 425° F. Line a cookie sheet with parchment paper.
Unroll one of the pie crusts and square the edges. Cut into rectangles. Place 1 tsp of jam in the center of a rectangle and top with another piece of crust. Crimp all four edges. Repeat until all of the pie crust is used.
Start to get upset because you can’t make twenty perfect rectangles with the crust you have. Pull out the rolling pin and try to make more rectangles with the crust you cut away in you futile attempts to make above perfect rectangles. Laugh at yourself through the tears as you end up with a few rectangles, some trapezoids and some kind of half-moon-looking, sad, little thing. Keep the swearing to a minimum when you accidentally get a little crimp crazy and poke holes in the crust.
Fix said holes like the baking MacGuyver you are and carry on.
Bake the pop-tarts for about 7 – 8 minutes or until slightly brown. If you don’t want to add extra sugar with the glaze, you can use an egg wash on the tops with some white sugar.
Perhaps it was the fact that my tarts ran the geometric shape gauntlet, but I found mine needed to cook from 8 to 10 minutes. Just watch them carefully, you want a nice golden-brown.
Allow the pop tarts to cool for 5 minutes. Meanwhile prepare glaze by adding milk to the sugar, 1 teaspoon at a time until the desired consistency is reached. Pour over pop tarts and sprinkle with decorating sugar. Serve warm.
You need to hear this…FOR THE LOVE OF GOD!!! LET THEM COOL FOR MORE THAN FIVE MINUTES!!!! I cannot stress enough the importance of cooling these taste bud obliterating, hot lava-filled, innocent looking hell-born treats! Seriously, walk away. You can glaze them while they are hot, but I’m telling you right now, if you take a bite within the first hour, you will likely lose the power of speech and the ability to taste for a good 24 hours.
Leftover pop tarts can be stored in an airtight container. To serve warm, heat in the microwave, or flat in a toaster oven. (Placing in an upright toaster oven is not recommended).
These are really delicious and my family loved them! So much better than the hard, store-bought variety. Enjoy…and don’t forget to let them cool!
I’m back! It’s been a wonderful and grueling summer at the same time, so I think I am rested up enough to tell you what is in the works around here. The last month and a half has been spent in a frenzy of work on our house, patio and yard. Since Jamie’s layoff, he’s been freed from the bonds of his oilfield salary and we’ve reflected on what we want our next chapter to look like. Together we have decided to sell our house here in Louisiana and head north to Ohio, where he was born and raised. For the 12 plus years we have been married, we have always lived near my family and now it is his turn. It’s time for our boys to get to know his family better. They are a close-knit group of wonderful people, so I am totally excited!
Louisiana is beautiful and I love my family here, but we all miss the seasons, though many people call me crazy for this. That’s okay, because I can think of few things as wonderful as watching it snow over a hot cup of coffee, a cozy fire, chili, soups and gumbos on cold nights, white Christmases, autumn leaves, hay rides and trick or treating while not sweating and being swarmed by mosquitoes, rain that cools rather than creating oppressive humidity…and so on. Yes, I love many things about Louisiana, but I miss the northern part of this beautiful country and I want my kids to know it now that they are old enough to remember it all.
Anyway, the boys and I drove up to Ohio a few weeks ago and looked at some properties:
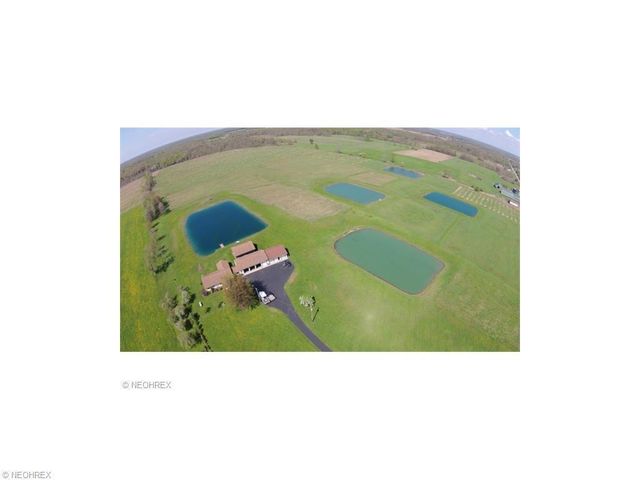
a fish farm,
a retired dairy farm,
a beautiful bed and breakfast,
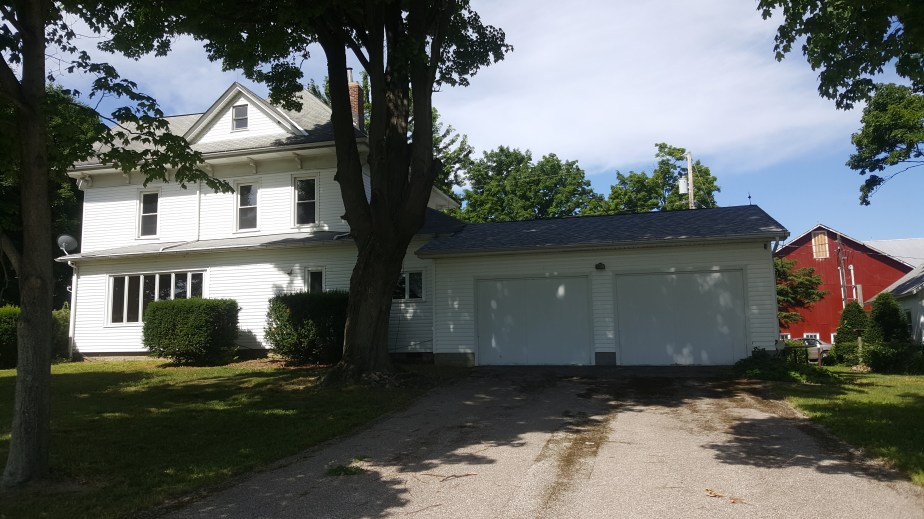
Jamie’s best friend’s mother’s remodeled century farmhouse,
and more. There are several possible places in which we can see ourselves building a life where we are able to live off the land and teach our kids the value of a good day’s work.
My kids are amazing, but let’s face it, we live in a society teaching them to stare down at their phones rather than look up at the stars. I should note that my kids don’t have phones yet, but all of their friends seem to, so it’s hard to live in a suburban area and teach them what we deem important.
The thing that really struck me while we were up there was how different things were because of the environment. My boys have cousins their age there and played outside with them from almost dawn to dusk. They built a fort, rode scooters, caught fireflies, explored and more, all with no fear of total dehydration, snakes, fire ants or being carried away by mosquitoes. Here in Louisiana, it’s been such a hot summer that, unless they are in the pool, I’m reluctant to leave them playing outside for too long. They rarely want to go out anyway, so it’s a constant chore trying to keep us busy in the air conditioning. Even at night, where it might actually cool down a little, I’m running to shut the chicken coop like I’m being shot at because of all the mosquitoes.
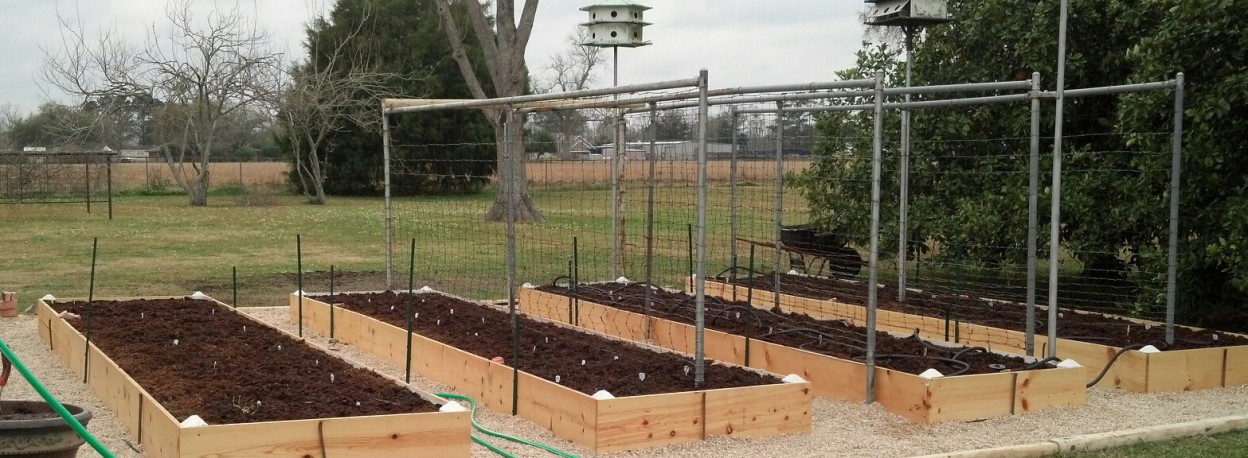
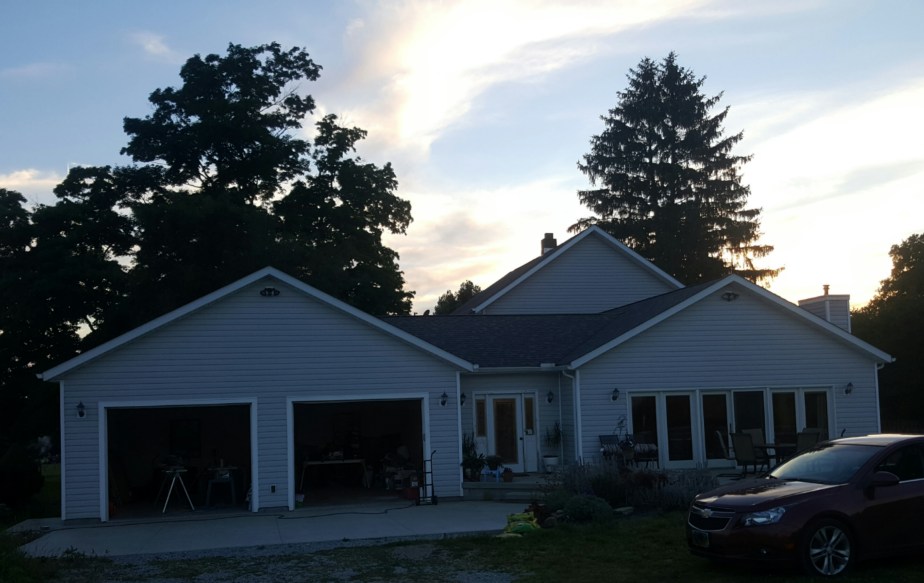
Anyway, we are looking at a simple efficient home with enough acreage to be able to grow most of our own food and perhaps earn a little money from the property. I can’t do that here in Louisiana because I seem to be unable to fend off the pest of the month in my garden and, though I’m not opposed to using neem oil, seven dust, DE, etc., I feel like we would all glow in the dark if I used what I needed to for successful pest control. Yes, people have offered help and advice, but I am willing to admit that, other than the basics like tomatoes and cucumbers, I’ve given up. Besides, once I can grow more things AND I have a basement, LOOK OUT! Canning paradise!
So after much, much, much work and flirting with being institutionalized for exhaustion and almost losing it, we finally listed our house last week. Now we can only sit back and pray that it sells quickly. We’ve done a ton of work and this place has a lot to offer, so even though it will be sad to say goodbye, I think we might just pull this off. We are in a desirable neighborhood with great neighbors, close to amenities and have more acreage than is normally available here, so fingers crossed!
Now you know. I hope to be much better at posting now that we are in the “wait and see” mode, but I have a few projects in the works. Hopefully, I will remember to take before and after pictures for you this time!
Nope, I haven’t been abducted by aliens. I have been down with the mother of all colds which has now moved into my sinuses. I always say, go big or go home, but I didn’t necessarily mean in all areas…
Anyway, the contractors are starting today and I have a few minutes of free time, so I wanted to share the magical recipe I stumbled upon last night. This weekend, thanks to my incredibly generous neighbor, Ms. Darlene, the boys and I picked about 4 gallons of blackberries. Now I love a good blackberry jelly, but 16 jars should tide me over for quite a while, so I was left with deciding what to do with the remaining berries. I love a good sorbet, but as sick as I’ve been, that seemed like a lot of work (it’s not), so I decided to use the jalapenos I just harvested and jazz things up a little. My boys have already killed two jars of this stuff because it is so yummy!
If you are new to canning, it can all seem a little daunting, but it really is easy and very addictive. If you have any questions, don’t hesitate to ask.
The first thing you’ll want to do is soak your berries in salted water. This will coax any critters out and you can rinse everything away before cooking. Rinse in a large colander and pick out any shmutz you don’t want in your food; grass, leaves, dried berries, etc.
I am not a huge fan of seeds in my spreads, so I always make juice first, milling out the seeds. There was just enough pepper to give you a hint of the flavor, but I may use another 1 or 2 next time. Here we go…
Blackberry Juice
Ingredients
4 cups blackberries
3-4 cups water, to almost cover the berries
Directions
Mash the berries in a pot with the water and cook for about 20 minutes over medium high heat, stirring occasionally.
Remove from heat and cool, then strain through a food mill, sieve or cheese cloth to remove seeds.
Blackberry Pepper Jelly
Ingredients
1 (1.75 oz) package powdered pectin
1/2 cup + 3 & 1/2 cups white sugar
4 cups blackberry juice
3 small jalapeno peppers, minced
1/2 tsp butter, if desired, to minimize foam
6 half pint canning jars, lids and rings
Directions
Boil enough water in a large canning pot to cover jars with one inch of water and submerge jars, lids and rings to sterilize.
In a large sauce pan, whisk the pectin and 1/2 cup sugar with the blackberry juice until well combined then add the butter and jalapeno and bring the mixture to a full rolling boil (a boil that doesn’t stop when stirred) for 1 minute.
Add the remaining sugar and return to a rolling boil for an additional minute, stirring constantly. Remove from heat, continuing to stir while removing jars, lids and rings from the canning pot. Scoop away any foam (foam adds air to your jelly which can promote bacteria growth).
Ladle jelly into jars leaving 1/4 inch head space and top with lids and rings.
Boil five minutes in a hot water bath to seal.
Serve over cream cheese on crackers or enjoy by itself. So good!
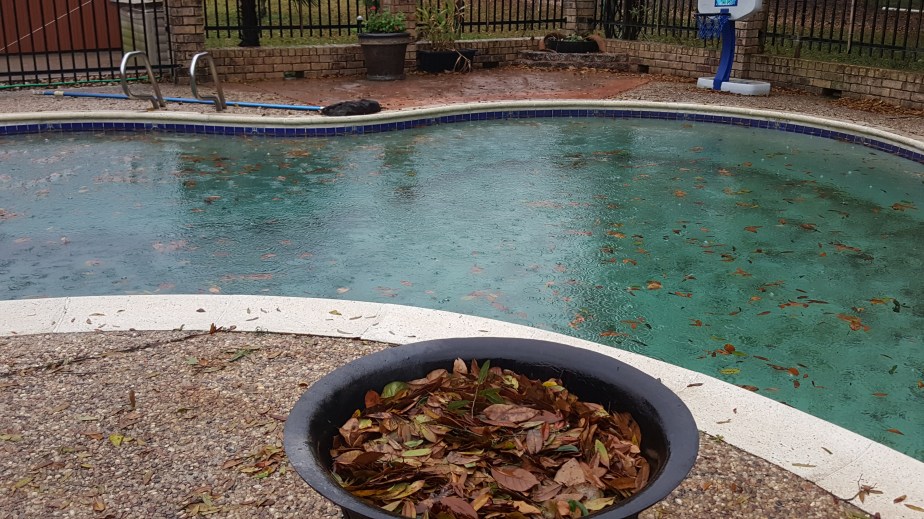
Boy, I sure played with that title for a while. Hard to talk about growing your own herbs without misleading the people. Any-hoo, I thought we’d talk a little “Homesteadin'” today since I can’t bring myself to look at food just yet, not after the last few weeks. Additionally, we have had sustained winds reminiscent of hurricanes past and I need something to distract me from the crystal clear pool I cleaned a few days ago which now looks like this:
I was regularly scooping leaves like a champ, in a constant hail storm of leaves, but finally tossed the net in defeat. Mother Nature: 37, Allison: 0
“15 beautiful live oak trees on the property will be a blessing,” they said. Hmm.
The Goal: grow more of my own herbs.
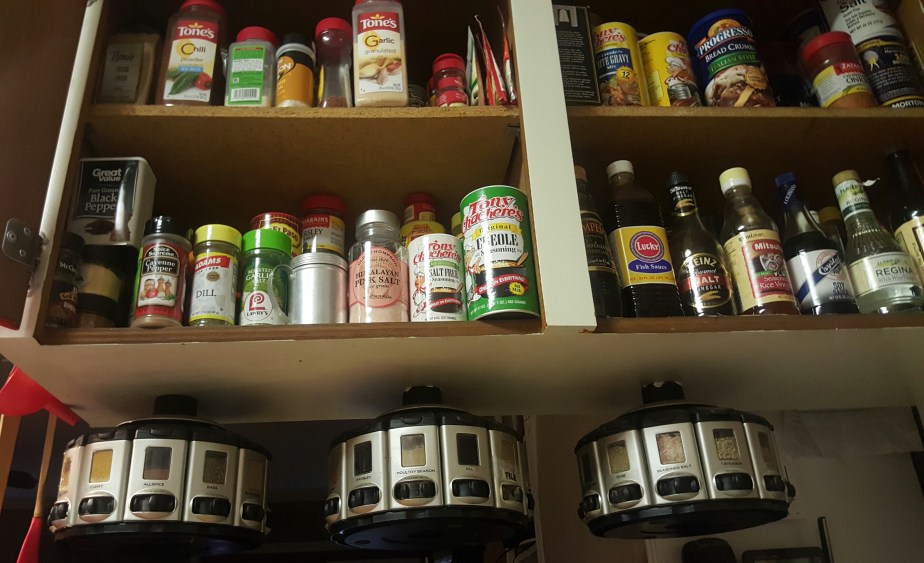
Clearly, if you’ve read a few of my posts, you know I love me some seasoning and don’t do well with boring food. This can get a wee bit pricey and you end up with a spice storage system slowly taking over your kitchen. Observe:
So maybe I have a small spice hoarding problem, OOORRRRRR, maybe I love to try new things and you’re just jealous. Don’t judge me!
Oops, sorry. Where was I? Oh, yeah…so a few years ago I stated thinking that I really needed to figure out how to increase my herb production. I mentioned that I have battled plague after plague since gardening in Louisiana: stink bugs, caterpillars, slugs, stink bugs, weird little trail leaving things that look like poop, slugs and so much more, so I was starting to feel a little defeated. Had my green thumb gone full black after coming back to LA from Colorado?
Thankfully, Jamie got me a little greenhouse at Harbor Freight Tools last year for a decent
price. It needs plastic wrap around it to keep the panels from blowing off in the wind (seriously), so I vow to get out and silicone the panels should it ever stop raining or gusting. Unlike everything else I was attempting to grow for a while there, my herbs all seem to thrive anywhere, but it was a great place to winter the surplus.
I also decided to grow a few of the things I use the most in pots in, or near, the house for easy picking and luckily, as I said, herbs and I do well together.
The Tools to Make Things Easier: dehydrator, mini chopper, mortar and pestle.
A few years ago I purchased an inexpensive food dehydrator, Even though it only has 2 temps, which I can’t control (“Meh” and “Sweet Mary, it’s LAVA!”) and those stupid holes in the middle of the trays, I use it all the time. I would strongly recommend getting one with the square trays and an adjustable temp, but if you are just getting your feet wet, go for the cheapo and rotate your trays a lot during dry time. For me, it’s been a Godsend because I don’t seem to possess the patience to wait for herbs hanging to dry or drying in a low temp oven. I also lack the memory to remember to use said dried herbs before they are cobwebby and full of dust. I also suggest a mini food processor (for a larger end product like with thyme, basil and cilantro) and a mortal and pestle set (for fine, powdery grinding as with stevia or cilantro salt for chips) . All three are great tools when drying, chopping and grinding your own herbs.
Dehydrator. Academy, around $25
Mini Chopper. Walmart, around $7
Mortal and Pestle Set. Amazon, around $10
The Basics: growing and storing.
It’s really amazing to me how easy most herbs are to grow. I have pretty small pots for a lot of mine and most have done fine in a window sill or on the patio. I have learned to harvest seeds from my best producers and they all do fairly well. It’s such a great feeling to walk over to your own plant and cut what you need when you have a recipe that calls for fresh herbs. I hate running out of anything (obviously) and if you’ve priced some herbs in the store, you’d swear they grew in Middle Earth and were watered by Bilbo Baggins himself.
You really only need to worry about:
Adequate sunlight.
Adequate water.
Comfortable temperature.
Basic maintenance.
Luckily, plants come with cheat sheets and the internet is a vast wonderland of information. Some of it is even true, I’m told!
Chopped in the mini chopper
Freshest go here
Cilantro in awesome Ikea pot.
I grow oregano, basil, cilantro, dill, stevia, mint, thyme, chives, green onions, parsley and more, but today I’ll focus on stevia.
Stevia is an increasingly popular sugar substitute and is a fairly easy plant to care for. It likes sun and water, with regular leaf cuttings to promote growth. Your best bet is to buy a seedling or small plant since the seeds can be tricky to start. I purchased one of mine at Home Depot for less than $3 and have gotten several cuttings from that first plant started successfully.
1 tsp of stevia is roughly the equivalent of 1 cup of granulated sugar, so a little goes a long way.
Stevia can replace regular sugar in cooking AND baking, but it will not caramelize.
It is recommended that you dry the leaves out right after cutting and cleaning, but that you wait to grind them until you are ready to use them. The leaves dry very quickly and I store mine in a tupperware container. When I’m ready to use them, I grind them with my mortal and pestle, since it produces far finer powder than a food processor.
Yesterday’s haul was about 7 or 8 large cuttings, leaves stripped and placed in single layers on 2 dehydrating trays. I dried these for about an hour and they came out perfectly.
I put most of the dried leaves in a storage container, but ground a few to use right away. (this gives you more sweetness).
The few leaves above produced over 1/2 tsp of powder which I used to make lemonade with some mint I had on hand. My boys loved it and it is amazing how well it works as a sweetener. I haven’t used in in cooking just yet, but I’ll keep you posted. I’ll admit that living in the land of sugar cane and coming from a family of cane farmers makes me rather loyal to the white stuff, but I’m going to try this!
There’s my 2 cents for today, just remember to grow what you love and use the most, start out small and save what you don’t use. Easy, peasy and ALL YOURS.
Several friends have approached me lately, thinking of getting chickens, but nervous about the unknown. I thought I’d share our limited experience and ideas to address some of the issues holding people back. We’ve been chicken folk for less than a year, but I hope through our fresh eyes, to either help them decide to take the plunge, wait or walk away.
For years Jamie and I have talked about raising chickens, but time restraints and insecurity kept us from taking the plunge. Neither one of us had ever raised chickens and I had been raised by a father whose career largely centered around rodent and avian borne diseases, so the thought of salmonella, or worse, histoplasmosis terrified me. We dreamed of daily fresh eggs, but had nightmares of illness and failure.
Last spring, when my beautiful nephew was born, my youngest son, Andrew, and I took a trip to Colorado to meet the little guy. I stayed with my sister, her husband, her ethereally gorgeous daughter and the new guy, and was once again reminded of my brother-in-law’s incredible skills as a gardener and a chicken whisperer.
Holy cow! Out of curiosity, I Googled “chicken whisperer” after writing this. He’s real guy and he’s not my BIL. Hmm.
They live on a smaller lot than we do, but you can’t throw a stick without hitting a chicken (I did not try this, btw. Purely speculation). Jamie and I had planned to have me bring some of their chicks back home, but he was going to be headed out to a new platform and so our chicken coop build plans were put on hold. We had nowhere to keep them, which was an even better excuse than “we are scared senseless,” so we shelved the idea and I came home chickless.
Because he followed his uncle around asking countless questions, Andrew came home a bit of an expert on all things poultry. I think this impressed Jamie enough to motivate him and I came outside to find him building the coop one Saturday morning. We burned up the internet looking for tips and tricks for everything from coop ideas to feed recommendations (thank you, backyardchickens.com) and felt a little less insecure as we gained knowledge.
Not finished, but occupied.
Finally, the day came. We were fortunate enough to have one of Jamie’s friends give us 8 hens, plus a rooster, to start out and we were excited, but still nervous. I honestly still thought it was a crazy idea; money, time, fear of illness to us, fear of illness in the birds, blah, blah, blah (apparently, I am a “fretter” in my old age), but we dove into our new life as chicken farmers anyway.
Surprisingly, it was so much easier than I expected it to be (of course, I was comparing the acquisition of 9 birds to my brother-in-law’s poultry army). We soon found ourselves sitting out in the yard in the evenings, having dragged the porch swing out to the chicken area, sipping wine and watching the birds for hours…until the mosquitoes drove us into the house. We often laughed at ourselves for finding chickens so mesmerizing, but they really are.
The vapors?
Watching a chicken chase a bug is hilarious, and I’ve heard people say that seeing them drop down for a dust bath or to sun themselves is terrifying, but I have 2 Corgis, which means I’m used to this. My dogs will fall or dive to the ground to roll in something exceptionally foul or just because they are happy, giving the appearance of being in the throws of a grand mal seizure. My little Bess will fall over onto her back directly in your path (I’m fairly certain my eventual death will be from tripping over a Corgi), an episode only cured by belly rubs. Oh, look. She’s having one now.
Anyway, the males in this house can eat eggs like they are going out of style, so not having to buy them anymore has been wonderful. We have worked our way up to 3-6 eggs a day and that is perfect for us. Sometimes we have enough to give to neighbors and sometimes we don’t, but we never run out.
As for my fears about expense, they have proven to be unfounded. For less than $30, we can feed the chickens for almost 3 months, which is less than what the 12-18 eggs a week I was buying at the grocery store were costing. Using the outer wall of our existing shed for part of the coop helped keep costs way down as well, so the wallet wasn’t too wounded. Additionally, Jamie built the ladders and roost out of branches from a tree I’d trimmed, which the birds seem to like and they didn’t cost a penny.
His brilliant nesting box design has made wearing our “poop shoes” necessary only on coop cleaning day and even the cleaning isn’t bad, especially with 2 strapping young sons to do it for us. I bought the dish pans we use for $1 each at the Dollar Tree and they fit perfectly into the boxes. Jamie is 6’1″ and just told me to make sure you all know that bigger is indeed better when it comes to a chicken coop. No stooping or head-hitting for this guy.
The nesting boxes
The door is hinged so egg collection is a breeze
We had heard from several people that their hens stopped laying during the winter months, so we put a light on a timer in the coop. It goes on just before dusk and goes off at about 8:30 pm. Other than the first week and one day when it was in the 30’s, we’ve never gone without an egg, so the light seems to be doing the trick.
Initially, we put a watering dish out there, but the mess was crazy. I had purchased
The water contraption
some chicken nipples (my boys find the name hysterical) on Amazon for about $1, so Jamie drilled some PVC pipe and placed them at the bottom. The nipples (tee-hee) are on the horizontal pipe and the vertical pipe has a removable cap to fill the L-shaped contraption. Again, this is so much cleaner and easier than a bowl and the birds started using them right away, abandoning the bowl almost immediately.
I had also heard many horror stories about evil roosters, and had in fact been rather terrified of one of my brother-in-law’s, but luckily, Cogburn has proven to be rather mellow. He crows a lot and at the oddest times; morning, noon, night, seemingly just because he can, but since the neighbors haven’t complained yet and he hasn’t ended up in someone’s stock pot, we don’t mind.
Cogburn
One thing I really love about chickens is that they are ravenous insect eaters. Since I live in an entomologist’s paradise, it’s fabulous to be able to release the flock and have them sweep the yard and garden, devouring all they can. Yes, they scratch and can tear up the grass, but the dogs and I move them around before they can switch from ants in the yard to plants in the garden or dig to China. This little army of bad a$$es even eats fire ants, so that right there makes it all worthwhile.
Because we have so many live oaks on the property, we are constantly battling leaves, as they basically drop them all year (oak leaves are to Jamie, as gophers were to Bill Murray’s character in Caddy Shack). Knowing their skills for scratching and hunting down insects, J started dumping leaves into the chicken area. They seem to love it, digging for insects and tossing leaves all day long.
Lastly, we love leftovers around here, but on the third or fourth night in a row, even my best chili or gumbo isn’t terribly attractive. Nowadays, I am free to toss food without guilt because chickens will eat anything. In fact, some of our best laying days have been when I had a healthy amount of food to clean out of the fridge. I love to watch them get excited when I come out carrying Tupperware, but I’m not as devoted as Jamie, who will actually make them hot oatmeal on cold mornings. Yeah, it’s kinda cute.
I almost wish we hadn’t waited, but I think the stress of having chicks would have been a bit much for we novices. I’ve actually been begging him to get more, but we need to save to fence the rest of the yard. We live on a large lot, but it’s on a corner and people sometimes shortcut down our road, driving way too fast.
I don’t profess to being an expert and I’m sure it won’t all be smooth sailing, but if you are thinking about raising chickens, go for it. I hope you’ll enjoy it as much as we do and if you think I’m crazy for saying we enjoy “chicken gazing,” well, I’m crazy for many reasons. I have children, after all.


 layers on 2 dehydrating trays. I dried these for about an hour and they came out perfectly.


 As for my fears about expense, they have proven to be unfounded. For less than $30, we can feed the chickens for almost 3 months, which is less than what the 12-18 eggs a week I was buying at the grocery store were costing. Using the outer wall of our existing shed for part of the coop helped keep costs way down as well, so the wallet wasn’t too wounded. Additionally, Jamie built the ladders and roost out of branches from a tree I’d trimmed, which the birds seem to like and they didn’t cost a penny.


