
As most of you know, our house is on the market. Things have been fairly slow because of first, the massive amount of layoffs from the oil industry this area relies so heavily upon, and then the devastating floods that we are still recovering from, and in some places, still experiencing.
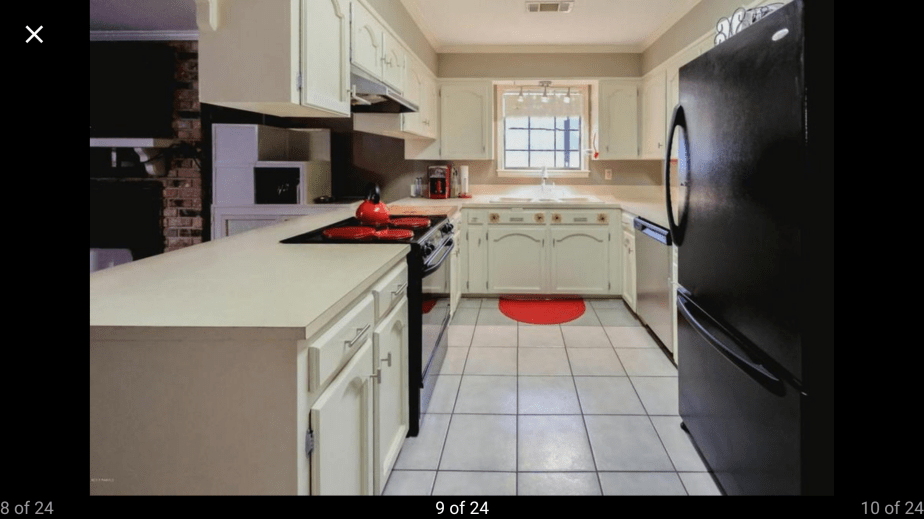
I was so determined to make something happen to sell quickly about a week and a half before the flooding started, so I decided that it was time to update the kitchen. For this house, with the land and the pool in this area, we are within a very reasonable price range, however, my kitchen definitely didn’t have a whole lot of “wow factor.” In fact, I hated it. Stained and cracked old laminate counter tops with no backsplash to break the monotony and nothing to emphasize the window looking out over the yard. I couldn’t imagine other people walking into the house and not feeling the same way.


I ran through my options- granite (not for the $4000 I was quoted on our current income, thanks), tile (meh), Ikea laminate (a trip to Houston isn’t doable these days), butcher block (expensive and no room in the garage right now, even if I wanted to make my own). I scoured the internet, home improvement stores and my own garage, coming up totally empty. Finally, I decided to try something crazy.
Jamie was at work, so I was safe. He couldn’t make fun of me or choke me (just kidding, he wouldn’t. Just eye rolling and wondering what the heck he married because “she’s at it again”) if he wasn’t here.
I measured my counters, headed to Home Depot and purchased the following-
- Wood glue
- Liquid Nails
- Lots of 1×2 strapping
- A few 1×3 straps
- Carbon Gray wood stain
- 1″ nails for my brad nailer
- Polycrilic, polyurethane or acrylic resin clear protectant
- Plastic Wood filler
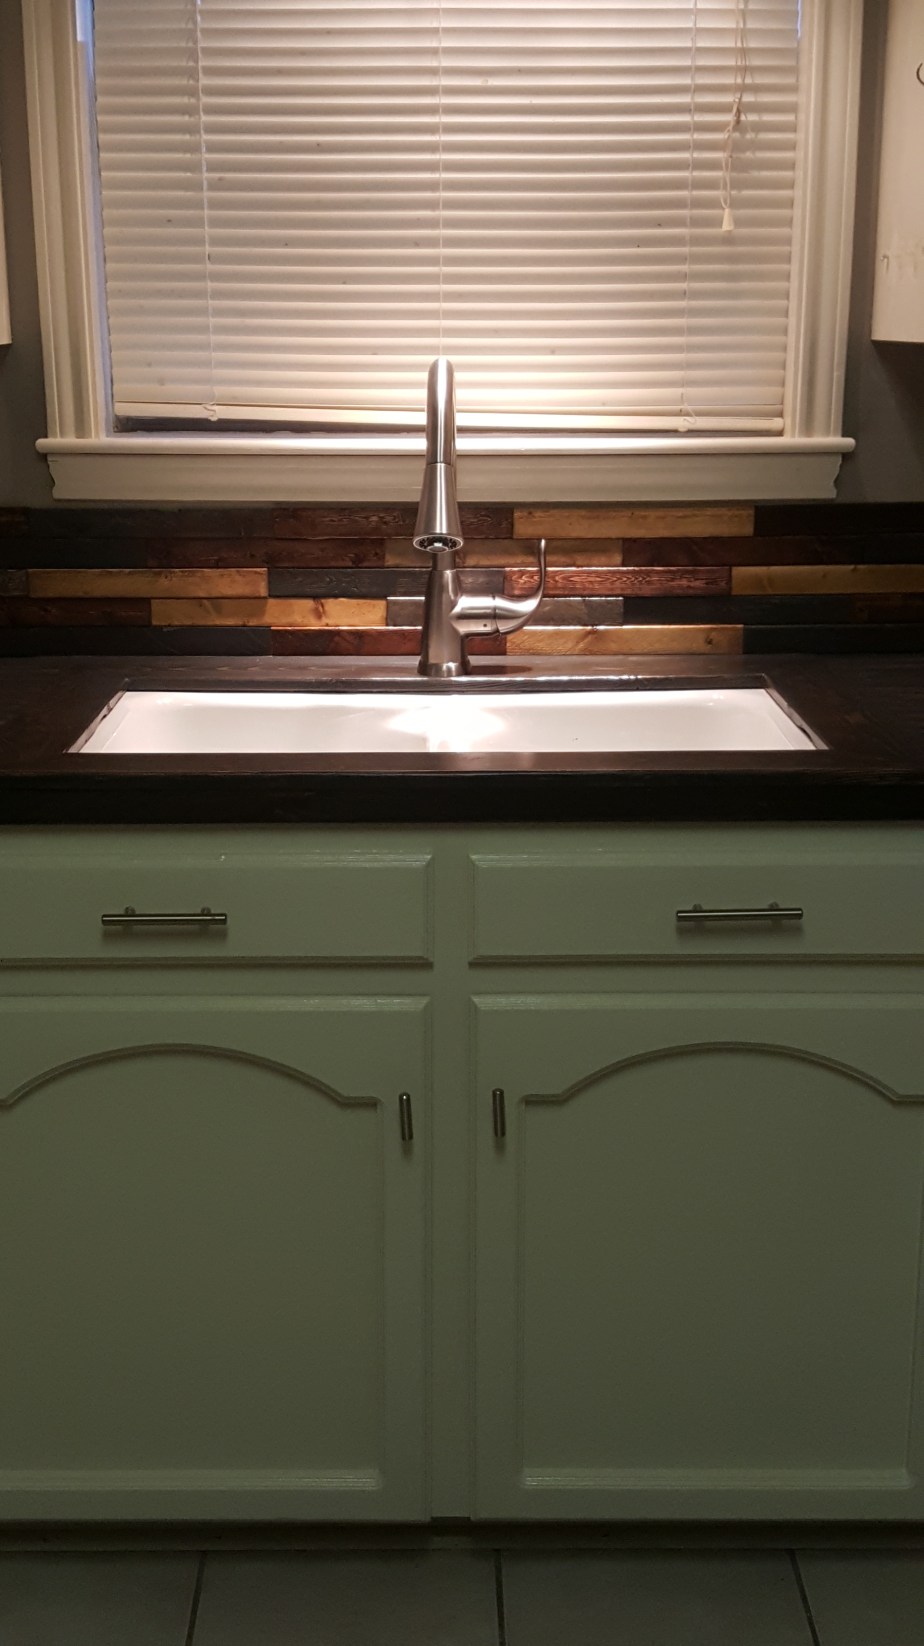
- A cheap, new sink on clearance for $70 (SCORE!)
- A new bargain faucet
- Plastic drop cloths


Step 1- Remove old sink (if replacing)
Since we’ve been in this house, people have complimented the old, cast iron kitchen sink, but they have not had to use it. It’s a 3 bowl sink with 1 shallow (3″ deep) bowl in the middle and 2 “larger” (8″ deep) bowls on the sides. Sure, it looked coolish, but try to wash a pizza pan or have your kids wash anything larger than a dessert plate without Niagara Falls on the counters and floor. Totally, impractical and that sucker was coming out.
If you aren’t replacing a sink, skip to step 2. The first step in removing a sink is to disconnect all the plumbing underneath. Have towels and bowls ready to catch drips and start by turning off the water at the wall valves. Then you will disconnect the water lines and the drains. I won’t kill you with details here and YouTube is where I received my instruction. Next, I scraped all the old caulk from around the outside of the bowl, removed old glue from under the lip of the sink and checked for removable clips underneath (there were none).
What I didn’t know was, that what the sink lacked in user friendliness, it made up for in weight. If you every need my help disposing of a huge body, just call because that would be a cake walk compared to getting that sink out of the counter top and then the house. Thank God we have a hand dolly because that monstrosity would have stayed in the middle of my kitchen floor until Jamie came home to help me lug it out to the garage.


Before I continued with the demo, I built a frame using 2×4 studs to hold the new sink since it was smaller than its offending predecessor.
Step 2- Remove old counter tops
Anyway, chore from hell complete, I began tearing apart the nasty, laminate counter tops. I debated about purchasing plywood to lay underneath the design I had in mind, but the wood under the laminate looked like it was in good shape and wasn’t going anywhere with all the glue and nails the installer had used. I kept the wood and saved money. This was not a fun job and about halfway through, I started wondering what in the heck I had been thinking. I heard Gob’s voice from Arrested Development in my head saying, “I’ve made a huge mistake,” several times.

If you need to replace the wood underneath, you can simply purchase plywood, but you may have to add 2×4’s to give you stability. For what I did, you will want to eliminate the chance of things falling through cracks into your cabinets and have something to glue and nail to.
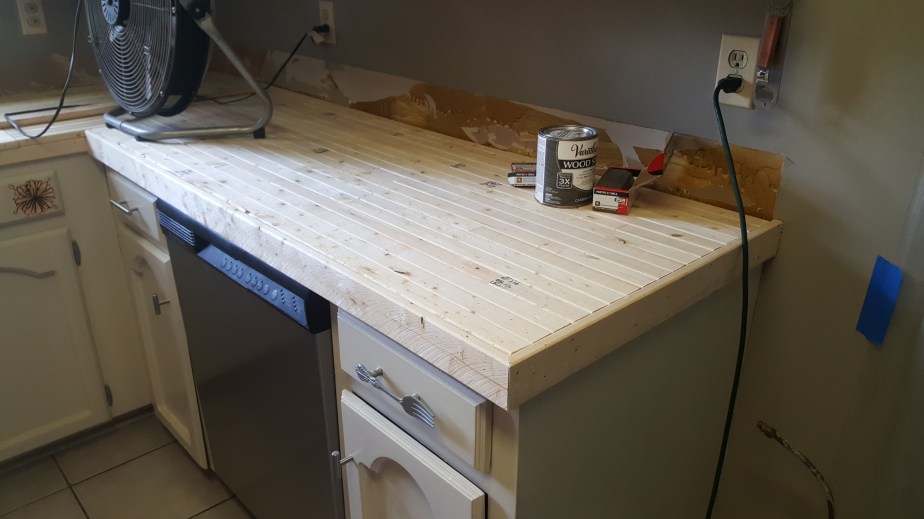
Step 3- Cutting and placing
I decided to go with the 1×2 strapping because it was A) $.92 a strip and, B) would give me a look close to butcher block when completed (though I was thinking, “Please, God! Let that be true!” at this point). I opted to cut my strips into 2′ pieces and staggered them similarly to a hardwood floor design, obviously needing to trim edge and corner pieces to fit. I removed my stove to make it easier to work, installed the new sink and began to lay my pieces, first gluing with wood glue, then pulling them tight and nailing with pins from the brad nailer (nail gun). I then used the 1×3 straps to trim the edges and around the sink, setting them in place with Liquid Nails and pins from the brad nailer and was done with construction. I was so frickin happy at this point, but I was only half way there…
Step 4- Sanding, putty and more sanding
By this time, Jamie had been home for a couple of days and was leaving for work again. His demeanor, plus the fact we were washing dishes in the bathtub and couldn’t use the kitchen, did little to convince me that he could see the end result that was in my head. I pressed on, telling myself that my vision would be realized and he would eat ample helpings of crow…I prayed that would happen, anyway.
If you have carpal tunnel, as I do, this is another point at which you will start to question your own sanity. Lots of stretching and ice is recommended. I use an orbital sander and the vibrations can be rough, so be sure to take lots of breaks.
First I sanded the wood after the glue dried. You’ll need to do this because the strapping is cheap wood. It’s hard enough to find straight pieces not full of knots, let alone smooth ones. I strongly recommend building a plastic cage like I did to keep the dust from invading and covering the rest of your entire house. I also put a fan in the window to blow the dust outside and you will absolutely need a respirator of some kind and eye protection. Simply attach strapping to the ceiling with plastic sheeting hanging down and weight the bottom of the sheets with more strapping to eliminate too much movement, like so-


Initial sanding complete, I was ready to vacuum the sawdust that remained and start to fill the gaps with putty. Originally, I intended to only fill the large gaps, but my OCD got the best of me, so I spent a VERY, VERY long time filling ALL the gaps between the slats and the nail holes. The plastic wood I tried this time was the perfect product for the job. It dried quickly and went on pink, drying to a natural wood color. I just prayed that it would stain like wood as the label claimed. I sanded the dried putty and wood slats to a smooth finish, then prepared for stain.


Step 5- Staining
This is when I allowed myself to get a little excited, catching a glimpse of the finish line for the first time. I started to stain, brushing it on and wiping it off in a few minutes, and my vision was becoming reality. I wasn’t sure about the color because I had pictured a slightly lighter gray with green undertones (tying kitchen, dining and living together), and would maybe have gone with an ebony if I’d known. The staining was finished fairly fast, but I wasn’t in love. I took a little mahogany stain I had in the garage, lightly ran some over the top of the gray and was happy with the result.


Step 6- Backsplash
I originally thought that there was enough glass tile left from the previous owner’s work in the bathroom to complete a backsplash in the kitchen. I was mistaken. Working on a tight budget, I headed to Home Depot again and realized that there was no way I could justify the cost of new tile for the job. I thought about using some red cedar I had, but it just didn’t look right.
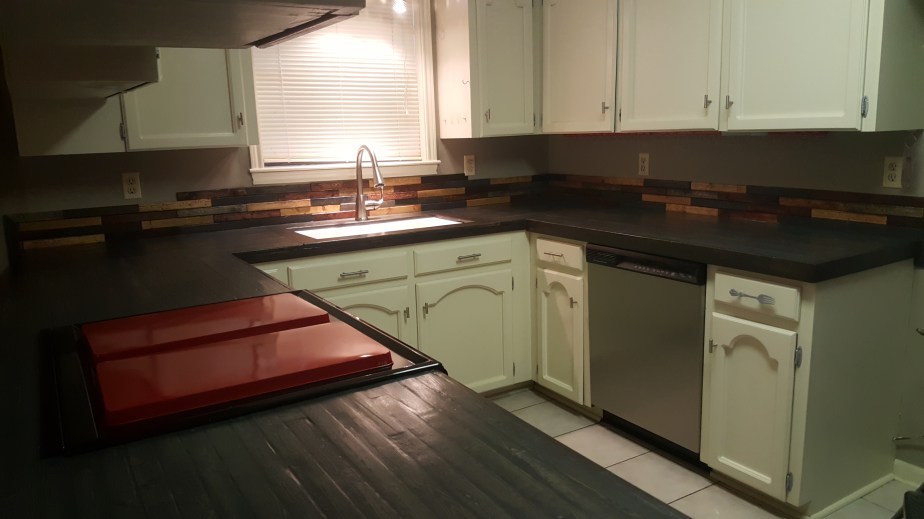
Eventually, I decided to try ripping the 1×2 strapping in half with the table saw (a terrifying job) and at first was discouraged that I couldn’t get all of the pieces to the same width. This was a blessing in disguise because I realized it was adding character to the overall look. I cut these into 12″ pieces, stained them with 4 different stain colors I had in the garage and staggered them, trying a few different variations before deciding on the final layout. I used a lot of Liquid Nails and a few pins from the brad nailer to attach them to the wall.
I’m pretty happy that I didn’t have enough tile!


Step 7- Polyurethane
I only had to wait a few hours for the stains to dry and was able to come back and apply the polyurethane to the counter tops and the backsplash. This would take longer to dry- 2 hours to the touch, 48 hours for light use and a full week until we could roll full steam. I opted to leave the plastic up to keep the cat and children from doing damage, but I was unable to protect it from myself. I decided that 2 hours was a long enough wait before replacing the stove without risk of scratches. It wasn’t.
I touched up the area around the stove, the paint on the cabinets, caulked around the sink, picked up some clearance fabric Andrew chose and whipped together curtains, then finally was able to stand back to view the finished product. I’ll be darned if it didn’t exceed my expectations. Jamie was shocked and really loves it. My friend Sandy, who is also my realtor and tough to please (TOTALLY, KIDDING, SANDY! You’re are amazing and you know it), was very happy with the results as well, even trying to get me to do her counters. It’s still a small kitchen, but it’s a heck of a lot nicer than the old, gross laminate! Would I do it again? Um, I’ll get back to you on that.
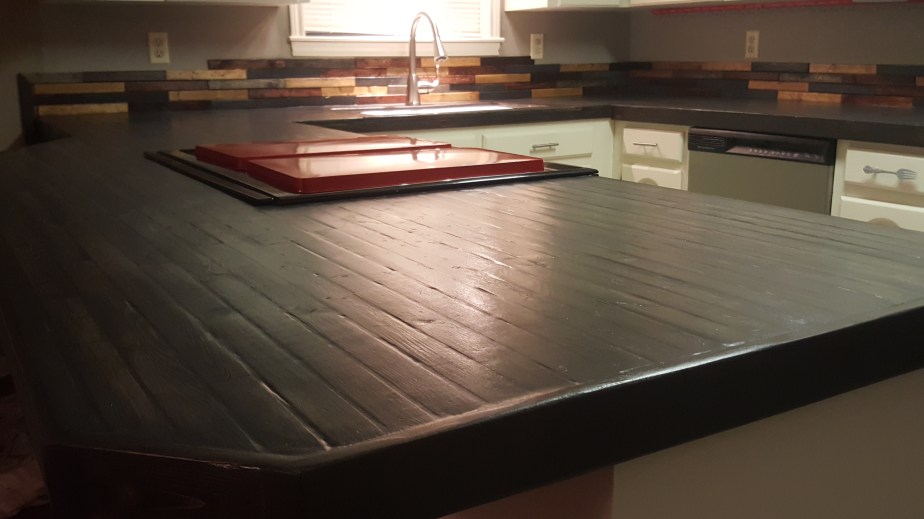

Oh, and I should tell you guy that this whole project was around $200!

You are so talented!!!
LikeLiked by 1 person
YOU are also so talented!
LikeLike
I am amazed and inspired. How long did it take to complete the project?
LikeLiked by 1 person
Thank you so much! If you don’t count curing time on the polyurethane, it took about 4 days
LikeLike
Taking back my previous comment because I see the project cost you’ve added to the end of the post…only $200. Wow! It looks great, I especially like the multi-colored back splash. As I said before, really, you are an inspiration.
LikeLiked by 1 person
Thank you so much. That is very kind! I’m certainly daring anyway. Lol
LikeLike