Over the years I have tried hundreds of variations of healthier snacks and have rarely hit on any winners. After the dangerous discovery of homemade fried potato chips, I had to find an alternative, lest I need to find a 12 step program instead. I don’t know if they have those for chip eaters, but I was ready to look. At the very least, I was headed for much larger pants. Anyway, since I still have a bunch of salsa, I decided to give it a try. It’s easy and painless, but you’ll need to make a lot to keep up with the demand.
Lime Juice, dried cilantro, cumin, chili powder, cheesy popcorn or other seasoning*
Directions
Brush or spray the tortillas with lime juice, if desired and let dry. Brush or spray with olive oil.
Cut the tortillas with a pizza cutter into wedges. You may have to cut strips for larger tortillas.
Brush a cookie sheet with olive oil and place the chips in a single layer on the sheet. Sprinkle with salt, if desired, but do not use cheese seasoning at this time. It will burn and not be terribly tasty.
Bake at 350° for 7-10 minutes, or until golden brown. Remove from oven and toss with any additional seasoning. Repeat until you have enough to satisfy the masses.
*I brushed the chips with lime juice and oil, then used my mortar and pestle to grind salt and some dried cilantro from the garden. I sprinkled the concoction on the chips and then baked them. Delicious!
Good morning, all! It’s a gloomy day in my neck of the woods, made gloomier by being up until the wee hours exchanging gifs with my dear friend, Carrie (this newer feature on Facebook Messenger is best discovered during daylight hours). Mama is tired, but luckily I stumbled upon a very easy winner in the kitchen last night and by golly, I’m making it again tonight. I’ll be a hero!
Remember Cheeseburger Cups from a little while back? Well, meet their cousin, born out of the fatigue which comes from raking and scooping 32 yards (or so) of leaves over the last few days. I figured, “Meh, why not?” and gave it a shot. I like to save my experimental or laziest and least difficult meals for my single parent weeks (I do not know how working single parents do it! They deserve super hero status) when Jamie’s gone and was in the mood for Mexican last night. Call me silly, but I like the man to eat well when he’s home since the cooking can be iffy offshore, or now, on the road.
My kids tore into these, but I would recommend doubling the recipe if you have more than three people at your table. The only complaint I received was a reprimand from Andrew for not putting out the olives. They are really good plain, but great dressed up!
Taco Teacups
Serves: 3-4 Prep time: 5-10 minutes Oven: 400 °
Ingredients
1 lb ground beef
1 package or 1/4 cup taco seasoning
2/3 cup water
1 tube refrigerated biscuits
1/2 cup shredded cheddar or taco mix cheese
cornmeal for dusting
Optional
sour cream, lettuce (chopped or shredded), tomato (diced), taco sauce, olives, etc.
Directions
In a skillet, brown the ground beef, drain and prepare according to taco seasoning directions, adding the taco seasoning and water.
Grease a muffin tin and dust inside the cups with cornmeal. Press biscuits into individual cups of the greased and dusted tin, bringing the dough up the inside of the cups, but not over the lip.*
Spoon the taco meat evenly into all biscuit cups and top with shredded cheese.
Bake at 400 degrees for 14-16 minutes or until golden brown.
Remove from muffin tin with a fork and top with lettuce, tomato, taco sauce, sour cream, olives, etc. Enjoy!
Note:
*Naturally, I got goofy and rolled my biscuits flat on a surface dusted with cornmeal. It added nice flavor and gave me evenly cooked biscuits.
Every parent knows that there are ups and downs to this child-rearing thing. We will always love our kids, laying down our lives if necessary, but there still are those days. Days when the messes defy logic, when the eye rolling and attitude are so bad that I have to remind myself that I wouldn’t do well in prison, and days when it’s all so overwhelming that you just want to sit down and cry. As much as we have all wanted to head to our blanket fort with a good book and a flashlight, hanging out the “Do Not Disturb” sign, that’s not usually an option.
Each child is different in so many wonderful ways, but they all have something in common; the need for some consistency and structure. This helps build trust and stability in their lives. Because my boys are adopted, they seem to need it even more than most (something hammered into us during the months of parenting classes we were required to take to foster/adopt) and I see immediate negative results when we deviate from our routines or have a break down in structure.
For example, when Jamie worked in the oilfield, he was gone two weeks and then home for two weeks. He would get home from a hitch with a touch of “Disneyland Dad Syndrome,” not enforcing rules and letting the back talk happen more. The rapid deterioration of basic manners and dropping of chores happened almost instantly and it would take me a week to get us back on track. I’m not blaming him at all, just stating my observations.
I’m trying to help my kids gain independence, but I feel like it’s my job to show them how to obtain and use it wisely. I believe that giving them household responsibilities as kids teaches them to be responsible adults. I want them to enjoy their childhood, of course, but I try to think of the end game as well.
The biggest factor for us is that the boys and I all have ADHD and our brains move a bit too fast at times. If I’m thinking about what I’m going to do after I put the laundry away, chances are I’m going to forget about the laundry and move on to the next thing. I’m like a pinball around the house, moving from job to job, but somehow getting it all done. It’s not always that easy for the boys, so I have come up with a few things to help them remember. I hope they inspire you and I’d love to hear some of the things you all have tried with success.
Here are a few ways to organize our kids’ and our lives.
1. Give everything a place to belong.
“Clean your room!” We have probably all said this a time or two, but know that this means different things to different people. In a child’s mind, it often makes sense that, if Mom can’t see it, it must be clean. Or, if I push everything into a pile over here, I’m good. Under my bed was a fantastic place to stash things when I was a kid; Voila! Clean (sorry, Mom). I learned a long time ago that everything needs a place to belong, leaving no gray area.
I labeled all of their drawers and wall hooks for easy putting away and finding things. The book shelves have labels too: coloring books here, legos here, etc. It helps them see the benefits of being organized.
I showed you the cup tower I made before and can’t stress enough how much it’s helped cut down on dishes, but it’s also the place where we keep the little important things like name tags, chore lists, any medicine, etc. Hard to miss, therefore hard to forget.
My guys are responsible for emptying the dishwasher, so I’ve even labeled drawers and hooks. They don’t need to ask me where everything goes anymore and they don’t have an excuse to shove things in any drawer they choose.
I have a laundry basket for each of them, but if I can ever teach them that it’s easier to hit the basket than collect dirty clothes from all over the room, I’ll let you know.
2. Make expectations clear and put them in writing.
My 42-yr-old post-menopausal, ADHD brain has a hard time remembering what I have to do today without writing it down, and God help me if I go to the store without a list. Young, hormonal kids saddled with tons of homework and the distractions this world sends their way aren’t much better off. Putting expectations in writing leaves no margin for error and simply helps them remember.
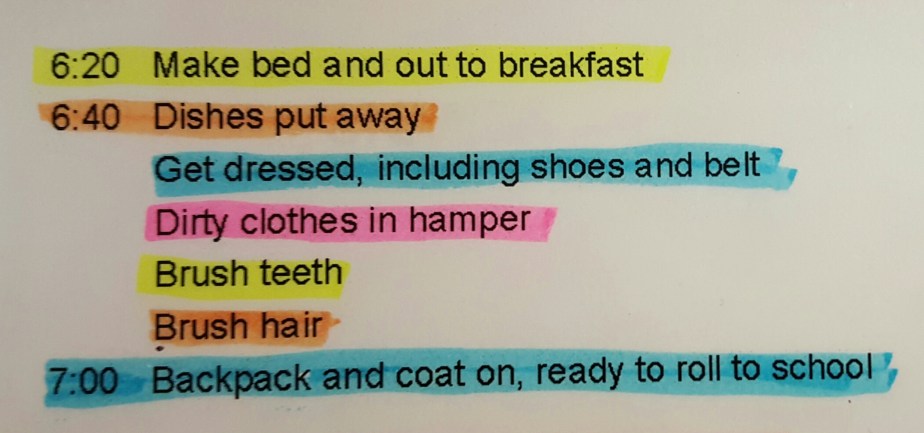
I created these lists for the guys to check throughout the day and I think they like them. Now every morning, instead of, “Did you do X, Y and Z?” I can just ask if they checked their lists.
It’s the path to privilege in our house. Completing your list for the day earns you TV time at night and allowance accrues. Completing the list consistently for the week can earn weekend video game time.
I used to have a larger sheet with it all on one page, but breaking it down into specific times of the day has made it less overwhelming and much easier to keep track of. The boys actually get kind of excited to grab dry erase markers and check things off.
Again, they want independence, so managing their responsibilities on their own is a great way to achieve that.
3. Have a schedule and stick to it.
I used to get a little flack and people thought I was so weird for not going out more often to weeknight or late weekend social events. If you know me, you know that even though I’m happy with my own company, I can be a bit of a social butterfly, so it wasn’t easy going into my cave. I’m not saying that life ends when you become a parent, but it does change. Dramatically, so when you get 2 boys at once dealing with childhood trauma.
Something I learned early on was that, while my kids will test me a lot, routine and consistency set them at ease. All kids benefit from routine and mine thrive under it, so yeah, we have to leave the party at 8 pm on a Friday night to be in bed by 9:30, and yes, dinner is always between 6 and 6:30 so we can be in bed by 8:30. I have schedules for the boys, but thankfully we have them memorized now.
A friend of mine was marveling at the fact that my kids are never late to school, but it’s because they know what’s expected. If you’re late, you don’t get TV, but if you’re the first one to the table, you get the easy morning jobs. Trust me, that’s not to say we don’t push our luck and that I never have to lose it in the morning, but it’s way easier than being a constant drill sergeant.
This is also a great way to teach kids the relationship between their actions and consequences or rewards. It can also make mornings a contest, and with 2 boys, everything is a competition. “First guy to the table calls what we have for breakfast” is a big deal around here.
Knowing what is expected and having that written reminder makes life easier on all of us.
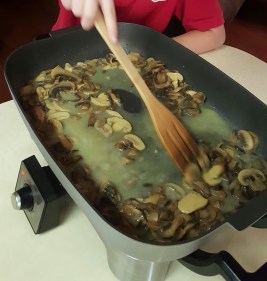
My stirring assistant did a fantastic job.
4. Teach your kids the life skills they won’t learn in school.
Most of us had the advantage of Home Economics and Wood Shop classes in school, but that seems to be a thing of the past. I’ve discovered that teaching my kids things like cooking, sewing and building can be really enjoyable for all of us.
Being a perfectionist made this a challenge in the beginning. I struggle with the “if you want something done right, do it yourself” mentality, but I’m learning to coach gently and let go of the reins a little.
Andrew loves working in the kitchen and building with wood, while Daniel shines at engineering and numbers (he’ll always have a balanced checkbook). Stirring and shooting from the hip are Andrew’s favorite things, but Daniel will measure everything perfectly; if it’s one of his favorite foods, he wants to know how to make it exactly right. They take pride in learning these basic skills and it’s a nice chance for us to spend time together.
Canning, housework, animal care, lawn care, how credit cards and mortgages work, are all skills they will need later and mine love learning everything. The trick is making it not seem like work.
5. Remember to have fun.
This can be tricky for perfectionists driven to try new things every day (no names), and it’s too easy to forget. The laundry needs to be done, bills paid, dinner made…the list is endless, but all the while our kids are growing up around us.
I’ve been so busy cooking, building and writing lately that I realized my kids were getting used to me being on the move all the time. They weren’t underfoot in the kitchen or asking me to play cards or outside with them anymore. Sure, we have a few games on the weekends and family movie night, but we haven’t been connecting like we should.
Last night I decided that we were having chili dogs for dinner and I was going to meet them in the yard for some football. I was ashamed of how surprised they were to see me come out and ask to be put into the game. Their excitement warmed my heart and reminded me in an instant why I signed on for this gig. I don’t need to have a successful blog or publish a book, I wasn’t supposed to learn skills so they could brag about my cooking or building abilities and I don’t need to be able to brag about having the best mannered kids on the block. I am here because I love these kids and I’m challenged with
The Guys with Michael Rooker. NO Comic Con 2015
making them into fine young men. A big part of that requires the greatest gift I can give them; My time and My FULL attention. I’m also proud to say that I was showered with compliments like, “Wow, Mom! I thought your were worse than that!” and, “Holy cow, how did you beat me when you are kinda’ old?” High praise, indeed…sorry, didn’t mean to brag.
Try something they love, or at least pretend to be interested. Luckily, my boys are nerds too, so we can do the Comic Cons together or watch good movies together, but there are generational differences that are hard to relate to. For example, I can’t even pretend to like some of the cartoons and music out there, but I’ll try everything once.
Read something you love to them and do the voices. It’s fun and a great reminder to them that parents have personalities.
6. Take time for yourself.
But wait…didn’t you just say to give them my full attention? Yes, but it doesn’t have to be 24-7. When we forget who we are, depression can creep in, so we all need a few minutes of our own company to recharge and stay comfortable in our own skins. Take five minutes to just sit and watch the sunset or sunrise and drink a cup of coffee. Have someone watch the kids long enough for you to take a bubble bath without the knocking on the door starting the second your toe hits the water.
You are so valuable and need those moments to refresh. Keeping yourself happy and healthy if vital to the kids’ survival…I mean, vital to their well-being as well as your own. Yeah, that’s it.
Yes, it’s official. I’ve been sucked into the kitchen far too often lately and I have lost my mind. Initially, this blog was going to be a recipe here and there kind of deal, but now I’m cooking and making things I haven’t in years. Today, for example, I have a sick child home from school and have decided on soup and grilled cheese for dinner, but in order to keep the recipe momentum going, I dug up one for something I haven’t made in over 20 years.
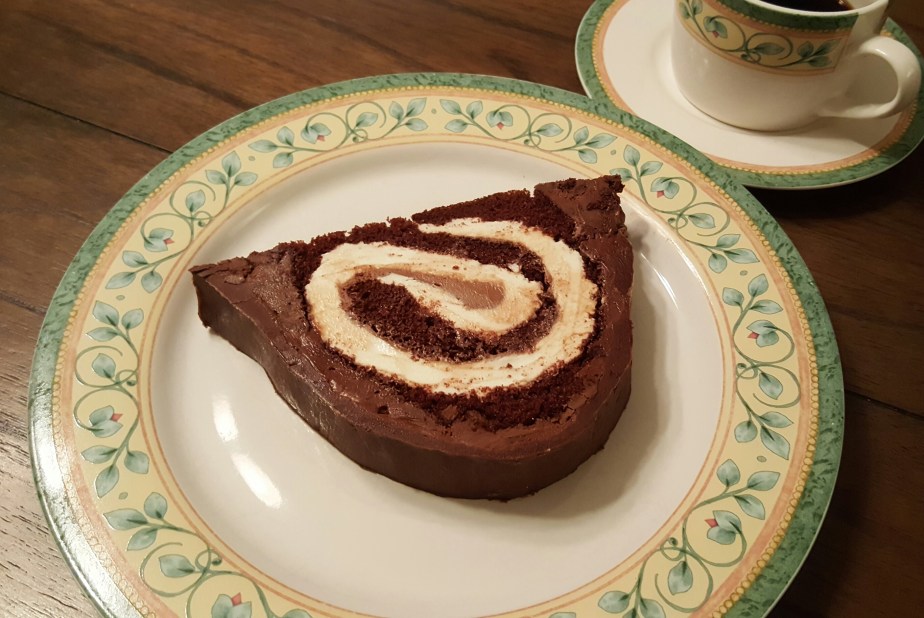
Ho-Ho Cake is basically a giant Swiss Cake Roll and was really easy to make and safe to eat when I was in my late teens and early twenties, but now maybe not so wise for my 42-yr-old metabolism. Did this knowledge stop me?
No way! I love this cake and even though it was a bit of a challenge and I’m now going to have to eat lettuce for a week, I have to share this one. The filling tastes just like the real stuff and IT IS SO GOOD!
I’m going to take you on a ride through one woman’s struggle to make a delight of her youth after a 20+ year hiatus. Be sure to read my account of what actually went down after the real recipe.
Ho-Ho Cake
Servings: a small village Prep time: Who cares? It’s a giant Swiss Cake Roll!
Cake Ingredients
1 box Chocolate or Devil’s Food cake mix and for that:
3 eggs
1 cup water
1/3 cup oil
Filling Ingredients
3 TBSP flour
1 & 1/4 cup milk
1 cup sugar
1 tsp vanilla
1/2 cup Crisco
1/2 cup butter, softened
Icing Ingredients
2 small packages unsweetened chocolate chips, melted
1 egg
1 stick butter
1 tsp vanilla
3 cups powdered sugar
2 & 1/2 TBSP hot water
Directions (what you’re supposed to do)
Prepare your chocolate cake mix and bake at 325 degrees for 20-25 minutes on a lined or greased 10 X 15 inch cookie sheet. Cool completely. Remove carefully to wax paper.
2. For the filling: Mix the flour and milk in a sauce pan and cook, whisking or stirring constantly, until thick. Cool completely and add the remaining filling ingredients, beating at high speed for 5 minutes. Spread on cooled cake and refrigerate for 1 hour.
For the icing: Beat all ingredients until smooth and spread about 1/3 of the icing on the chilled cake, placing a thin layer on top of the filling.
Carefully, roll the cake into a log, using the wax paper to lift and being careful not to roll the paper into the cake. Use the remaining icing to frost the outside of your rolled cake. Chill to set, then slice and enjoy!
Directions (what I ACTUALLY did)
Yep, got that right and even took my cake trimmer and made it perfectly level. Don’t do this. You’ll see why.
Yep, got the filling perfect and everything was tasting and looking pretty good at this point.
For the icing: I realized I had no unsweetened chocolate chips and with a sick child at home, I wasn’t going to the store. No problem, I had some store bought chocolate frosting I could use. Why not? I’ll tell you why not in a second. I spread a little of the frosting over the filling and we were off to the races.
Level and loving it!
Masterful filling!
Frosted like a boss!
Now to neatly roll my perfect rectangle into a log. Ever so carefully, I lovingly rolled that beautiful thing up into a photo-worthy masterpiece! It was breathtaking!..until it cracked because I just haaaaddto shave it level and the cake was now too thin to hold up. I contemplated keeping this little secret and showing you only the final product, but I’m letting you in here, people. This is the real story.
Wait!!! WTH happened here?
There was still hope at this point, 1 cup chocolate chips mixed with 2 TBSP coconut oil makes a great “Magic Shell” frosting, but a little whipping cream and an extra dab of coconut oil could give me chocolate spackle!
Now, to grab the double boiler and melt the chips and coconut oil (microwave doesn’t work so well for me), but BLAST! No double boiler in sight (The problem with kids emptying the dishwasher over here is that the dishes only make it to their designated area about 65% of the time). No problem, I totally MacGyvered it!
2 cups chips, 2 TBSP coconut oil
Redneck double boiler?
I tried spreading my store bough frosting, but it just ripped more of the cake off, so I filled the holes with a cake decorating tip and bag of said frosting. I put this eyesore in the freezer for about ten minutes, not even able to will myself to photograph its hideous visage.
When my spackle, I mean, chocolate drizzle was ready, I set to work trying to save the disgusting log thing. I used a rubber spatula and tiny cake decorating knife and managed to smooth things out pretty nicely. Sure, it’s a little shiny and resembled a chocolate poo from a distance, but it was presentable, in my opinion. I took some lovely pictures and almost used one as the featured image until I realized that it shows you just how much chocolate filler I used…I present to you:
CHOCOLATE SPACKLE WITH FROSTING AND A DASH OF CAKE!
I’m getting a sugar rush just looking at this picture.
You know what though? It’s darn good. Sure, I can only eat a quarter of a slice without risking diabetes, but that’s healthier, right? Plus, one slice will last like three days and the rest freezes like a champ!
The moral of the story? Just follow the main directions and you should be okay. In fact, unless you’re notthe klutz I am, just serve as a sheet cake. Just kidding, your friends and family will love this. It’s really not difficult…unless you are me and we’ve all seen how well my cakes work out.
Be sure to click the “follow via email” link on the right so you never miss a post! Thanks, guys!
It’s the Monday morning after Daylight Saving and we are a grumpy, exhausted bunch of zombies in this house. It’s time to pull out the big guns: It’s Big Sammich time. This is an easy meal which brings much joy into our lives and is a much needed fix for the lost hour causing strife around these parts.
The Big Sammich, named by Andrew as he danced for joy when seeing me make it one day, can be easily tweaked to meet your family’s tastes. If they aren’t pesto lovers, try spinach, sun-dried tomato pesto or even pizza sauce.
Big Sammich
Ingredients
1 loaf French or Italian bread, cut open
3-4 lunch meats, we used pastrami (the crown jewel), turkey, ham and chicken
2-3 TBSP prepared pesto
3 sliced cheeses, we used Swiss, Provolone and sharp cheddar
1/4 cup shredded parmesan
olive oil
garlic salt to taste
1 TBSP horseradish sauce (optional)
Directions
Open the loaf and spread the pesto on both faces of the bread, adding the horseradish sauce, if desired. I used Tony’s Zesty Sandwich Sauce. Sprinkle garlic salt, if desired, followed by the parmesan on one side, then layer your lunch meats and cheeses. Alternate between meat and cheese, making sure that the cheese meets bread to help everything stay together.
Close the sandwich and spray or brush the outside with olive oil, then sprinkle garlic salt.
Bake for 25-35 minutes, wrapped in foil at 350 degrees. Slice and enjoy.
I have a confession to make…I’m a little scared of eating fish. I used to love it, but I had a bad experience and have since gone into every fish eating moment with fear, expecting that overpowering fishy taste or to chomp down on a bone. Since I know it’s good for us, I force myself to make it but I am always on the lookout for recipes that make fish less fishy. I love Jamie’s fish fry and there are certain fish I can really enjoy, like grouper and tuna, but the mental block has been the worst.
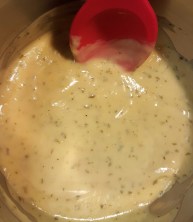
I finally stumbled onto something that the whole family can enjoy and the sauce is fantastic. I mean, fan-freaking-tastic, people! I always double the sauce recipe, as my photos prove, and I am not ashamed. I’ll do it again.
You probably have most of the short ingredient list on hand, so let’s hop to it!
Poached Salmon with Béarnaise Sauce
Servings: 4, unless you live with Andrew and he eats 3/4 of the entire dish.
Prep time: 5 min. Cook time: 8-10 min.
Ingredients
1 cup water
1/2 cup white wine (dry is best)
salt and pepper to taste, if desired
Béarnaise Sauce:
1/4 cup mayonnaise or Miracle Whip
The secret’s in the sauce!
2 TBSP lemon juice
1 TBSP Dijon mustard
1 tsp sugar
1 tsp tarragon, fresh minced or dried
salt and pepper to taste
In a skillet, bring wine and water to a simmer (add salt, pepper and a dash of Tony’s, if you like), then add the salmon. Cook without boiling for 8 to 10 minutes or until steaks flake easily with a fork. Remove from skillet, divide steaks and keep warm.
In a small saucepan, while the salmon simmers (very poetic, don’t you think?) combine all the sauce ingredients well with a whisk. Cook over medium low heat without boiling, whisking until warmed through. Season with salt and pepper to taste and serve over salmon.
Well, it’s raining again, though thankfully the wind has let up because I was worried about my chickens ending up in Oz. Being stuck inside means I have lots of time to play in the kitchen and boy, have I! Last night’s dinner is a favorite around these parts and it is so easy, it will blow you away. My mushroom hater and pesto skeptic both did a little dance around the kitchen for this one, proving my theory that anything can be hidden under cheese if you play it cool enough and make it taste yummy.
I halved the recipe since it was just the boys and me, but a little does go a long way with this rich, yet not overpowering dish. I would not cut the recipe in half again, however because there was much sorrow when they realized there would be no leftovers for tonight. Pretty high praise when Friday nights are usually “Fantastic Family Night” in our house. This means a favorite dish and a movie or board game, usually followed by popcorn and whatever crazy snack I throw together.
Next time you get home late and crave a little gourmet food on fast food time, this is the ticket! Let me know what you all think!
Pesto Olive Chicken with Mushrooms
Prep time: 5-10 minutes (most of this time spent fighting plastic wrap) Cook time: about 17 minutes
Ingredients
4 boneless, skinless chicken breasts
1/2 cup prepared pesto
4.5-12 oz canned, sliced mushrooms (2 little cans or 1 big one)
1 small can chopped olives
1 cup shredded provolone cheese (you can substitute with mozzarella, parmesan, etc.)
Garlic salt, pepper, Tony’s etc. to taste
Directions
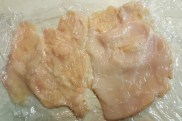
Place the chicken breasts between 2 pieces of plastic wrap, leaving plenty of room around the edges for the chicken to “spread,” and flatten with a meat mallet until 1/3 – 1/2 inch thick.
Place the chicken in the bottom of a 13 X 9 baking dish and cover with the pesto, spreading evenly. Sprinkle with garlic salt, pepper and Tony’s, if desired, to taste. Top with mushrooms and then olives.
Bake, uncovered at 400 degrees for 15 minutes. Remove from oven, sprinkle with cheese and then return to oven for an additional 2 minutes, until cheese is melted and chicken juices run clear.
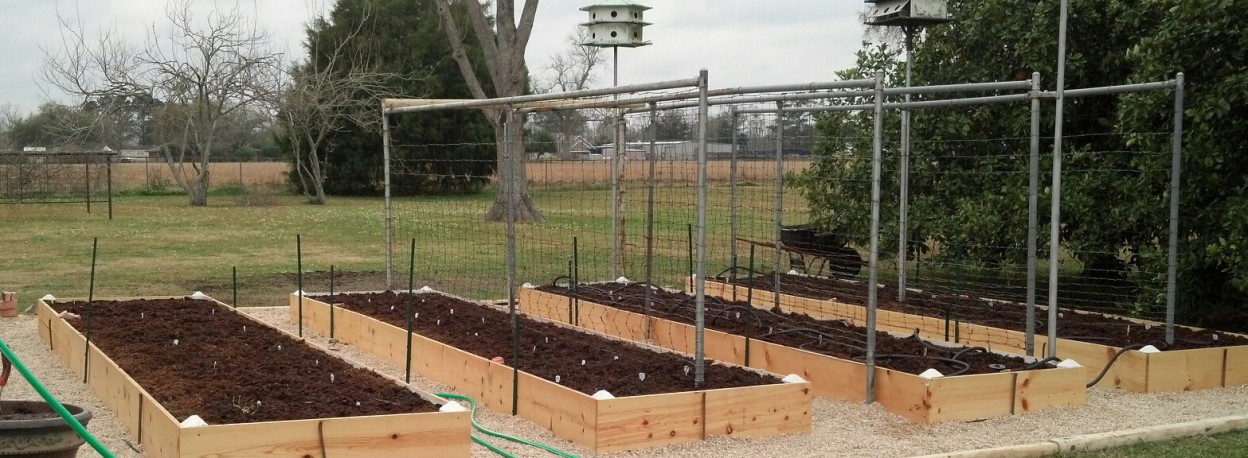
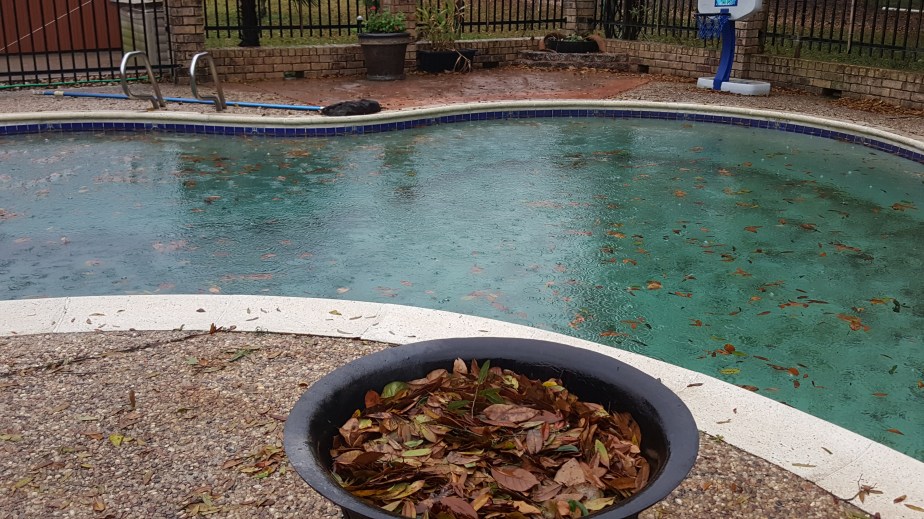
Boy, I sure played with that title for a while. Hard to talk about growing your own herbs without misleading the people. Any-hoo, I thought we’d talk a little “Homesteadin'” today since I can’t bring myself to look at food just yet, not after the last few weeks. Additionally, we have had sustained winds reminiscent of hurricanes past and I need something to distract me from the crystal clear pool I cleaned a few days ago which now looks like this:
I was regularly scooping leaves like a champ, in a constant hail storm of leaves, but finally tossed the net in defeat. Mother Nature: 37, Allison: 0
“15 beautiful live oak trees on the property will be a blessing,” they said. Hmm.
The Goal: grow more of my own herbs.
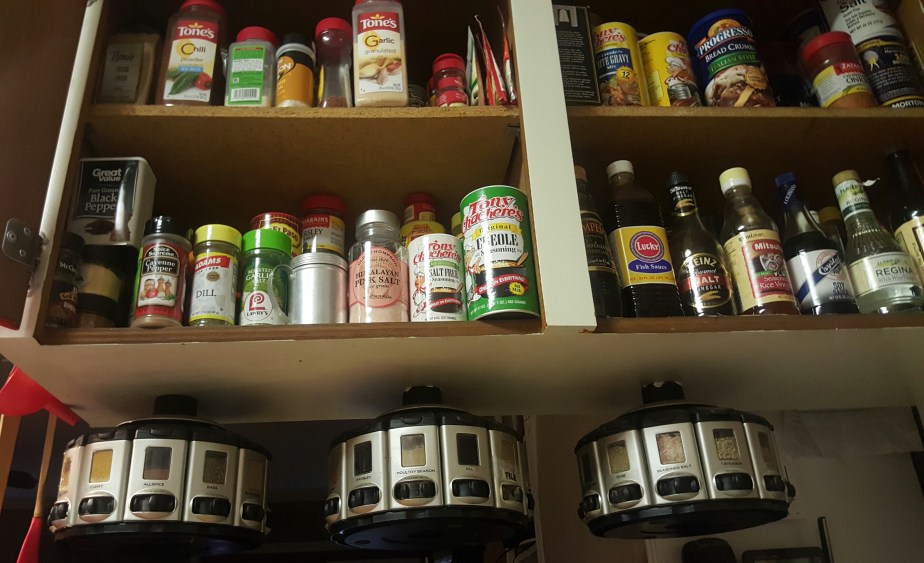
Clearly, if you’ve read a few of my posts, you know I love me some seasoning and don’t do well with boring food. This can get a wee bit pricey and you end up with a spice storage system slowly taking over your kitchen. Observe:
So maybe I have a small spice hoarding problem, OOORRRRRR, maybe I love to try new things and you’re just jealous. Don’t judge me!
Oops, sorry. Where was I? Oh, yeah…so a few years ago I stated thinking that I really needed to figure out how to increase my herb production. I mentioned that I have battled plague after plague since gardening in Louisiana: stink bugs, caterpillars, slugs, stink bugs, weird little trail leaving things that look like poop, slugs and so much more, so I was starting to feel a little defeated. Had my green thumb gone full black after coming back to LA from Colorado?
Thankfully, Jamie got me a little greenhouse at Harbor Freight Tools last year for a decent
price. It needs plastic wrap around it to keep the panels from blowing off in the wind (seriously), so I vow to get out and silicone the panels should it ever stop raining or gusting. Unlike everything else I was attempting to grow for a while there, my herbs all seem to thrive anywhere, but it was a great place to winter the surplus.
I also decided to grow a few of the things I use the most in pots in, or near, the house for easy picking and luckily, as I said, herbs and I do well together.
The Tools to Make Things Easier: dehydrator, mini chopper, mortar and pestle.
A few years ago I purchased an inexpensive food dehydrator, Even though it only has 2 temps, which I can’t control (“Meh” and “Sweet Mary, it’s LAVA!”) and those stupid holes in the middle of the trays, I use it all the time. I would strongly recommend getting one with the square trays and an adjustable temp, but if you are just getting your feet wet, go for the cheapo and rotate your trays a lot during dry time. For me, it’s been a Godsend because I don’t seem to possess the patience to wait for herbs hanging to dry or drying in a low temp oven. I also lack the memory to remember to use said dried herbs before they are cobwebby and full of dust. I also suggest a mini food processor (for a larger end product like with thyme, basil and cilantro) and a mortal and pestle set (for fine, powdery grinding as with stevia or cilantro salt for chips) . All three are great tools when drying, chopping and grinding your own herbs.
Dehydrator. Academy, around $25
Mini Chopper. Walmart, around $7
Mortal and Pestle Set. Amazon, around $10
The Basics: growing and storing.
It’s really amazing to me how easy most herbs are to grow. I have pretty small pots for a lot of mine and most have done fine in a window sill or on the patio. I have learned to harvest seeds from my best producers and they all do fairly well. It’s such a great feeling to walk over to your own plant and cut what you need when you have a recipe that calls for fresh herbs. I hate running out of anything (obviously) and if you’ve priced some herbs in the store, you’d swear they grew in Middle Earth and were watered by Bilbo Baggins himself.
You really only need to worry about:
Adequate sunlight.
Adequate water.
Comfortable temperature.
Basic maintenance.
Luckily, plants come with cheat sheets and the internet is a vast wonderland of information. Some of it is even true, I’m told!
Chopped in the mini chopper
Freshest go here
Cilantro in awesome Ikea pot.
I grow oregano, basil, cilantro, dill, stevia, mint, thyme, chives, green onions, parsley and more, but today I’ll focus on stevia.
Stevia is an increasingly popular sugar substitute and is a fairly easy plant to care for. It likes sun and water, with regular leaf cuttings to promote growth. Your best bet is to buy a seedling or small plant since the seeds can be tricky to start. I purchased one of mine at Home Depot for less than $3 and have gotten several cuttings from that first plant started successfully.
1 tsp of stevia is roughly the equivalent of 1 cup of granulated sugar, so a little goes a long way.
Stevia can replace regular sugar in cooking AND baking, but it will not caramelize.
It is recommended that you dry the leaves out right after cutting and cleaning, but that you wait to grind them until you are ready to use them. The leaves dry very quickly and I store mine in a tupperware container. When I’m ready to use them, I grind them with my mortal and pestle, since it produces far finer powder than a food processor.
Yesterday’s haul was about 7 or 8 large cuttings, leaves stripped and placed in single layers on 2 dehydrating trays. I dried these for about an hour and they came out perfectly.
I put most of the dried leaves in a storage container, but ground a few to use right away. (this gives you more sweetness).
The few leaves above produced over 1/2 tsp of powder which I used to make lemonade with some mint I had on hand. My boys loved it and it is amazing how well it works as a sweetener. I haven’t used in in cooking just yet, but I’ll keep you posted. I’ll admit that living in the land of sugar cane and coming from a family of cane farmers makes me rather loyal to the white stuff, but I’m going to try this!
There’s my 2 cents for today, just remember to grow what you love and use the most, start out small and save what you don’t use. Easy, peasy and ALL YOURS.
It’s been a long day and you are exhausted. Ordering a pizza would be the easiest thing to do, but you almost feel guilty doing that. Okay, I would because I’m weird about eating out. I think most people who love to cook aren’t huge fans of letting a restaurant cook for them. Plus, I spent 14 years in a field that overlaps with pest control, but that’s a disgusting story for another day. Anyway, it’s getting close to dinner time, you want pizza, you have the ingredients, but if only you had a quick and easy crust…
I wanted to post this before the pizza recipe, but I was so excited about that one that I couldn’t wait. So, by popular request, I bring you crust!
I know a lot of people don’t like to do their own pizza crust because they can take forever, but this one is fairly simple and really tasty. The great thing is that you can also use whole wheat flour and the kids won’t know the difference.
Prep time is about 20 minutes, so it doesn’t get much easier than that.
Last Minute Pizza Crust
Ingredients
1 (.25 oz) package active dry yeast, or 2 1/4 tsp
1 tsp white sugar
1 cup warm water
2 1/2 cups flour
2 TBSP olive oil
1 tsp salt
cornmeal for dusting
Directions
In a medium bowl, dissolve yeast and sugar in water (not hot). Let stand until creamy, about 10 minutes.
Yeast, sugar and water after 10 minutes
Stir in the flour, salt and oil, mixing until smooth. Rest 5 minutes.
Turn dough out onto lightly floured surface, rolling and patting into a workable ball.
Roll or press onto a lightly greased baking sheet dusted with cornmeal.
Brush with olive oil and garlic salt, then bake at 450 degrees for about 5 minutes, or until slightly golden brown. This will ensure your crust cooks through.
Remove from oven, spread with sauce, cheese and toppings. Bake 15-20 minutes at 450 degrees until golden brown or as desired.
This crust can easily be stretched to make 2 thin crust pizzas, just be sure to adjust baking time to prevent burning.
Though I have every intention of making this blog about more than just food, it seems I am on a cooking roll right now, so I’m going with it. I admit though, it kind of bums me out to think that, while I dressed like this for ComicCon last year:
If I keep up this cooking and eating pace, I’m probably going to have to go with one of these next year:
C’est la vie. At least I’m keeping up my cardio and strength training (snicker, snicker).
So yesterday was the kind of day where I played in the kitchen all day. I made some popcorn balls, tortilla chips and more fruit snacks and thought it was a pretty fine day…until I realized it was 5 pm and I hadn’t pulled anything out for dinner. We usually eat at 6 and so I sprang into action! Ok, not really, but I did decided to make pizza, a favorite around these parts.
I’m not a huge fan of pepperoni. It’s not that I don’t like it, but it can be so greasy and my post-menopausal digestive system seems to handle it very poorly. I have had to try several different alternatives and this chicken, bacon and ranch is a favorite. In fact, when we sat down to eat last night, the conversation with my newly picky eater went like this:
“How do you like your pizza, Andrew?”
“Great! Thanks for getting Domino’s, Mom! This is their best chicken ranch I’ve ever had!”
“It’s not delivery, I made it.”
“No way! I just can’t believe that.”
“Gee, thanks.”
“No, I mean, if you’re telling the truth, this is your best pizza ever!”
Then, when eating his third slice, “Did you not put jalapenos in it just for me?”
“There are jalapenos. I just cut them up very small.”
“Wow. I just can’t believe it.”
So either I’m usually not up to par in the kitchen with this guy, or I have finally mastered hiding things in food. Whatever the case, if Andrew can sing this pizza’s praises, your picky guys will like it too. I do this differently than most because of this new found picky phase, allowing me to hide the good stuff in the sauce under the cheese.
I’ll post the crust separately.
Chicken, Bacon and Ranch Pizza
Ingredients
1 pizza crust, refrigerated tube or homemade
1-2 boneless, skinless chicken breasts, cut into small cubes
2-3 slices of bacon, cut into “bacon bits” size
3-4 TBSP onion, minced
1 small jalapeno, seeded and minced
1-2 TBSP garlic, minced
1 cup ranch dressing
1-2 cups mozzarella
Salt, pepper and Tony’s to taste.
Directions
In a 12-14 inch skillet on medium high, fried the chopped bacon until crispy. Remove from pan and drain, then set aside.
In the same skillet, using the bacon grease, roast the garlic until golden brown on medium high, stirring to prevent burning and sticking, about 3-5 minutes.
Add the onion and jalapeno and saute until the onion is clear, about 3-5 minutes, then add the chicken. Cook until the chicken is no longer pink and the juices run clear, stirring often, about 5-7 minutes. I will use my utensil to make the chicken pieces smaller while cooking. Drain any liquid.
Add the ranch, salt, pepper, Tony’s and garlic salt, if desired, to taste. Return the bacon, remove from heat and stir to combine all ingredients well.
Bake your pizza crust, spread on a pan greased and dusted with cornmeal, brushed with olive oil and sprinkled with a little garlic salt, for about 5 minutes in a 450 degree oven, until slightly golden (I abhor raw dough in my pizza) and then remove to counter.
Spread the chicken ranch mixture evenly over the crust and then top with cheese. You can garnish with green onion, chives, cilantro, or whatever.
Return to oven and bake 15 minutes or until cheese is melted and crust edge is golden.
Slice and enjoy!
**********************************
For an easier alternative, you can use store bought real bacon bits and saute your veggies and cook the chicken in olive oil, but where’s the fun in that?
This recipe, my crust and all, can easily be stretched into 2 thin crust pizzas.
If you really want applause, sprinkle a little Tony’s over the top of the entire pizza.


 1. Give everything a place to belong.


 the edges for the chicken to “spread,” and flatten with a meat mallet until 1/3 – 1/2 inch thick.


 layers on 2 dehydrating trays. I dried these for about an hour and they came out perfectly.